Windows XP Windows 7 Windows 2003 Windows Vista Windows 綜合教學 Linux 系統教學
Windows 10 Windows 8 Windows 2008 Windows NT Windows Server 電腦軟體教學

Win7 如何開啟與建立 XPS 檔案?內建 XPS Viewer 與 WPS 列印輸出教學

編輯:Win7 系統應用技巧

XPS(XML Paper Specification)是微軟推出的文件格式,可替代 PDF。Win7 內建 XPS Viewer 可直接開啟;建立 XPS 則可透過具備「列印至 XPS」功能的辦公軟體(如 Office 2010、WPS Office)完成。本文提供完整操作教學。

一、建立 XPS 檔案(以 WPS Office 為例)

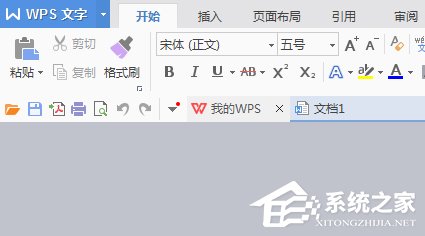
1. 開啟 WPS 文字

點選左上角「WPS 文字」選單。

WPS 文字介面

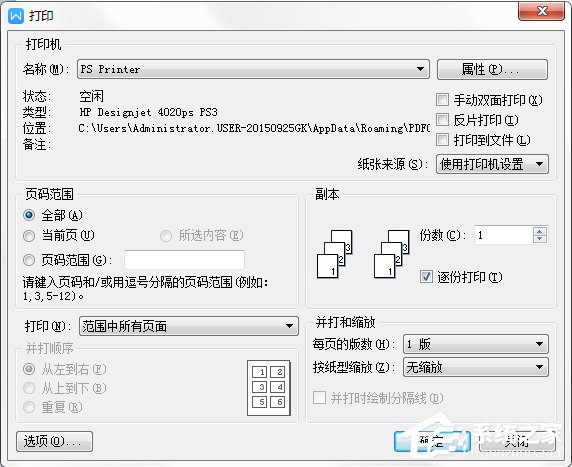
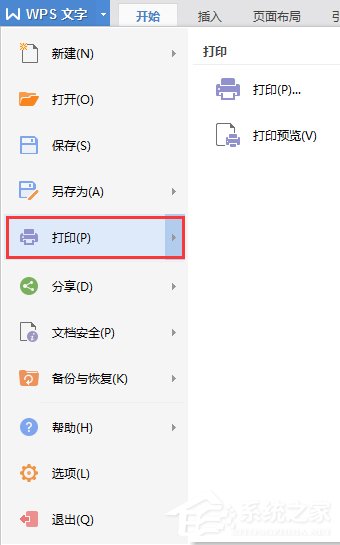
2. 進入列印介面

點選「列印(P)」或按 Ctrl+P。

列印介面

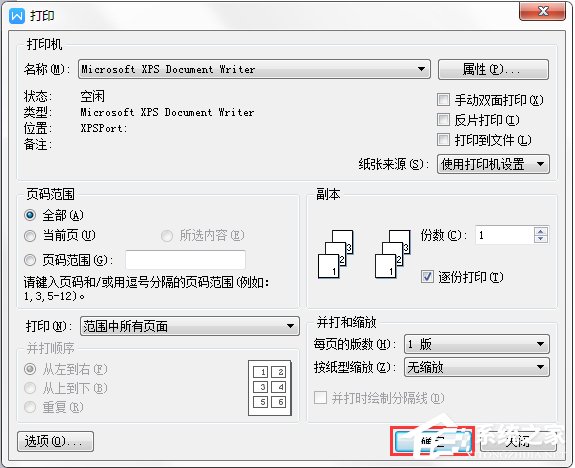
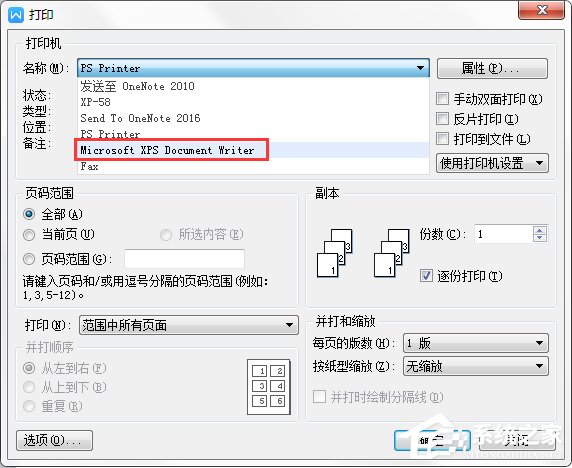
3. 選擇 Microsoft XPS Document Writer

在印表機下拉選單中選擇 Microsoft XPS Document Writer。
選擇 XPS Document Writer

確認選擇

4. 確認並輸出

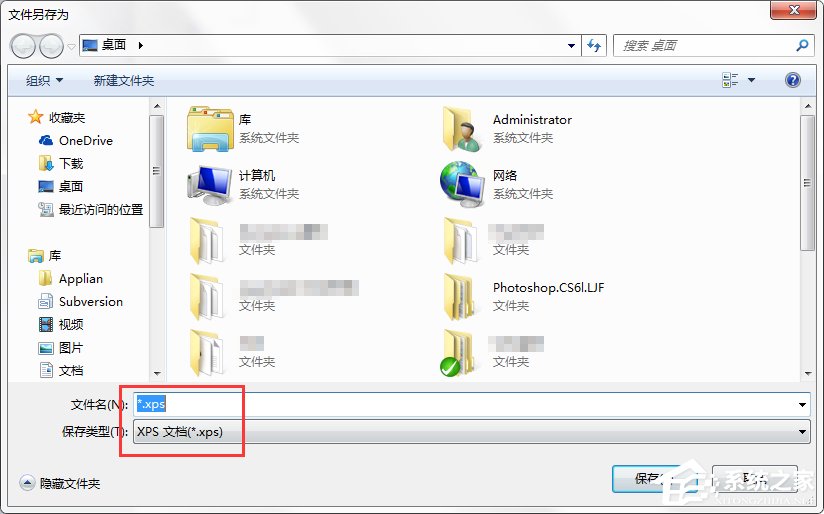
點選「確定」→ 另存新檔視窗中選擇儲存位置、檔名,存檔類型確為 *.xps → 儲存。
確認列印

另存為 XPS

完成建立

二、開啟 XPS 檔案

1. 尋找 XPS Viewer

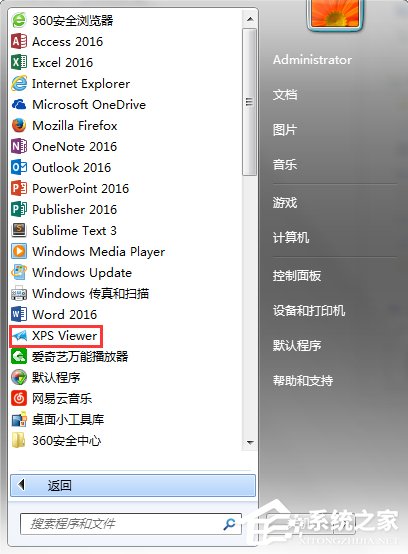
開始 → 所有程式 → 找到藍色紙飛機圖示的 XPS Viewer 並開啟。
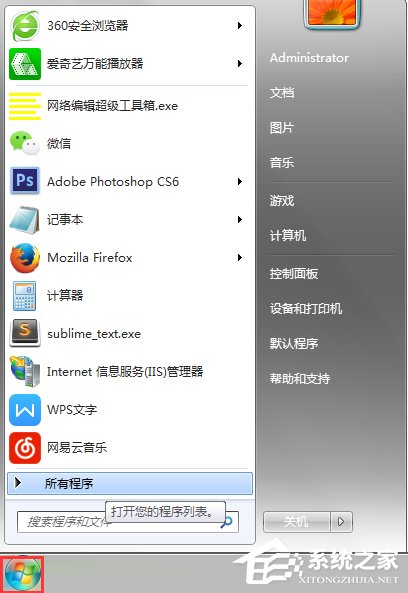
所有程式清單

XPS Viewer 圖示

2. 開啟檔案

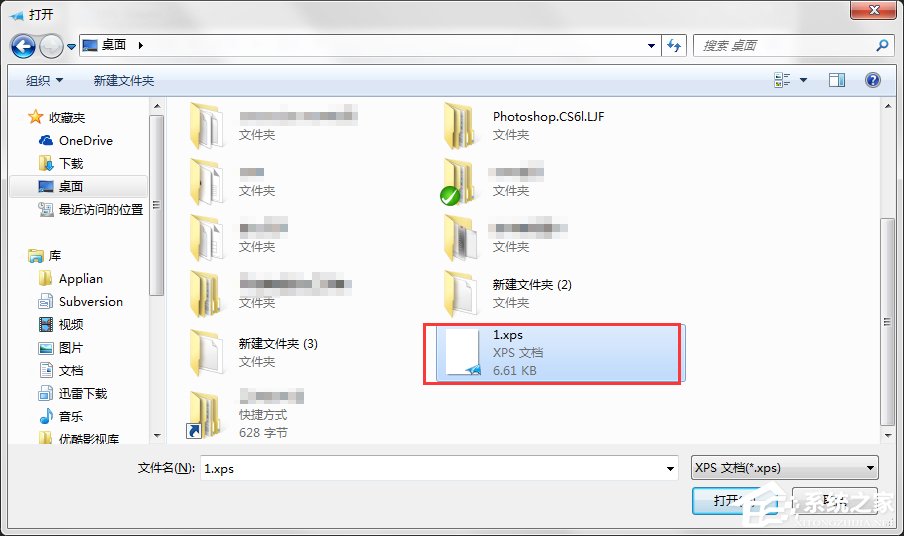
XPS Viewer 中點選「檔案」→「開啟」→ 選取剛建立的 .xps 檔案 → 開啟即可瀏覽。
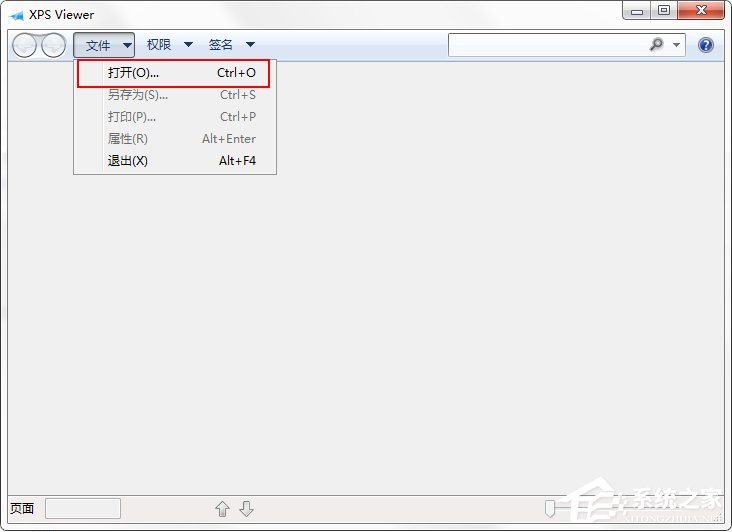
XPS Viewer 開啟檔案

瀏覽 XPS 內容

補充說明

  • Office 2010/2013/2016 同樣支援「另存為 XPS」或「列印至 Microsoft XPS Document Writer」。
  • XPS Viewer 為 Win7 內建元件,無需額外安裝。
  • 若系統精簡版移除了 XPS Viewer,可至「控制台」→「程式和功能」→「開啟或關閉 Windows 功能」勾選「XPS 檢視器」安裝。
Copyright © Windows教程網 All Rights Reserved