Windows XP Windows 7 Windows 2003 Windows Vista Windows 綜合教學 Linux 系統教學
Windows 10 Windows 8 Windows 2008 Windows NT Windows Server 電腦軟體教學
您现在的位置: Windows教程網 >> Windows教程 >  >> Windows 綜合教學 >> 關於 Windows

Windows 8.1 移除「Secure Boot 未正確配置」水印:BIOS 兩大模式完整設定教學

編輯:關於 Windows

Windows 8.1 桌面右下角出現「Secure Boot 未正確配置」水印,表示 UEFI Secure Boot 狀態異常。Secure Boot 為防止惡意開機程式的安全機制,需在 BIOS 正確啟用並載入原廠金鑰。本文針對兩大常見 BIOS 介面提供完整設定流程。
共同前置動作

  • 重開機連續點擊 F2 / Del / Fn+F2 進入 BIOS (依廠商不同)。
  • 操作完成後按 F10 / Fn+F10 儲存並離開。

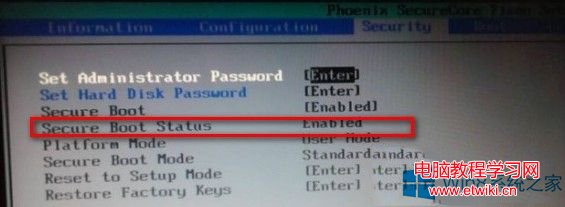
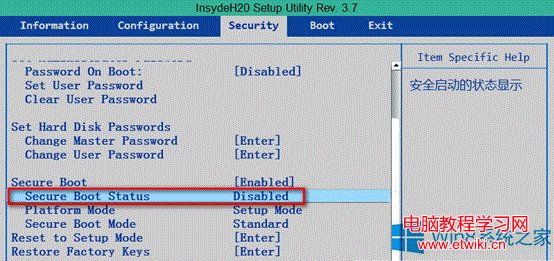
模式一:Security 選單含 Secure Boot 選項,但 Status 顯示 Disabled

BIOS模式一介面
  1. Security → Reset to Setup Mode → Enter → 選 Yes → Enter (清除現有金鑰)。
  2. Security → Restore Factory Keys → Enter → 選 Yes → Enter (載入原廠金鑰)。
  3. 按 F9 / Fn+F9 → 載入 BIOS 預設值。
  4. F10 儲存離開 → 重新進入 BIOS 確認 Secure Boot Status 變為 Enabled。
  5. 進入系統,水印消失。

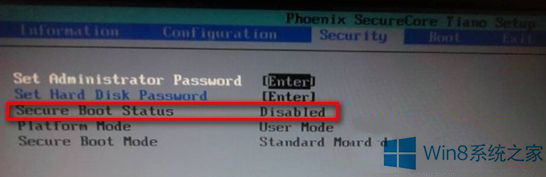
模式二:Security 選單 Secure Boot Status 灰色不可更改

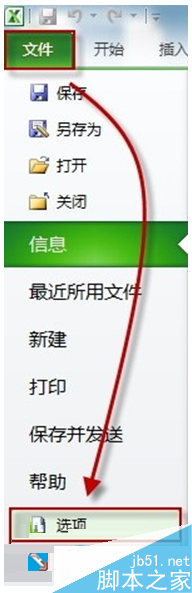
BIOS模式二介面
  1. Boot → Boot Mode 設為 UEFI (非 Legacy/CSM)。
  2. Exit → OS Optimized Defaults 設為 Win8 64bit (或 Win10 64bit)。
  3. F10 儲存離開 → 重新進入 BIOS。
  4. Security → 確認 Secure Boot Status 變為 Enabled。
  5. Secure Boot啟用確認
  6. 進入系統,水印消失。

核心原理

  • Secure Boot 需三條件同時滿足:**UEFI 模式啟動 + 載入平台金鑰 (PK/KEK/db/dbx) + 作業系統載入器簽章驗證通過**。
  • 模式一透過重設金鑰庫 + 載入原廠金鑰完成;模式二透過切換 UEFI 模式 + 套用作業系統優化預設值觸發金鑰載入。
  • 水印消失即代表 Secure Boot 正常運作,系統開機鏈路完整性受保護。

BIOS 介面千變萬化,核心邏輯不變:**找到 Secure Boot 相關選項 → 確保 UEFI 模式 → 載入原廠金鑰/套用 OS 優化預設 → 驗證 Status 為 Enabled**。遇到不同介面舉一反三即可。

Copyright © Windows教程網 All Rights Reserved