Win10 檔案保護功能 (WFP) 防止系統檔案被取代,若需手動取代系統檔 (如修改主題、破解補丁) 需暫時關閉。透過群組原則設定即可。
gpedit.msc 開啟群組原則編輯器。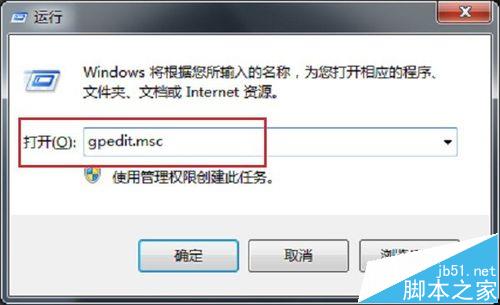
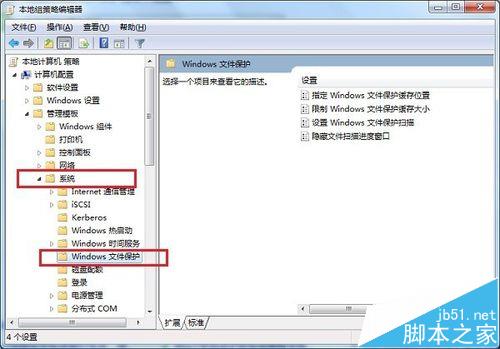
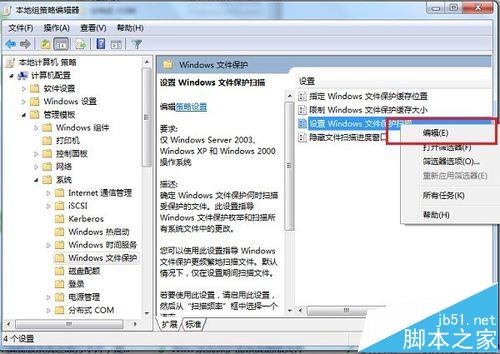
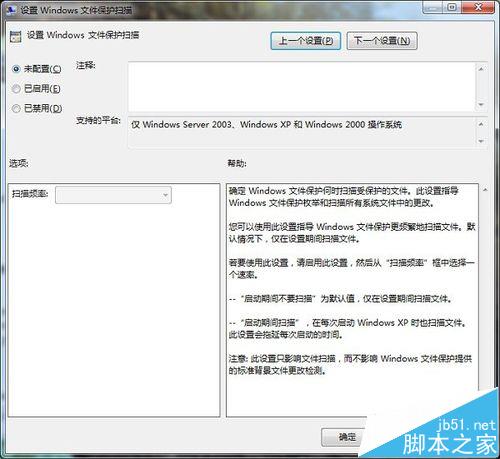
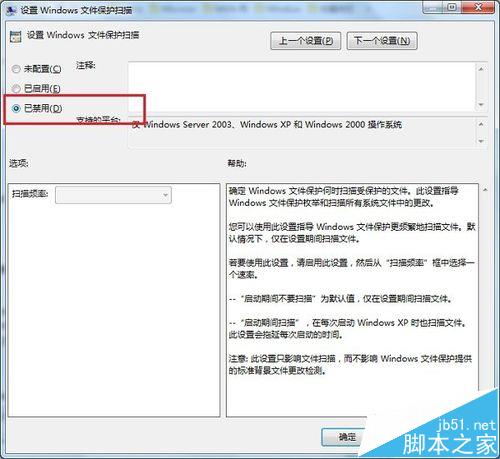
警告:關閉檔案保護後系統檔案易受損,完成作業後建議重新啟用 (設為「未設定」或「已啟用」) 以維護系統安全。
Windows 10 企業版、專業版、家庭版三大版本差異快速比較
Win7 設定雙螢幕 (多顯示器) 完整教學:複製模式、擴充模式、解析度調整
Win8 關閉混合關機(快速啟動):控制台電源選項取消勾選啟用快速啟動
Win10 移除 Windows Media Center 部分 Win7/Win8.1 用戶強烈不滿 甚至威脅永不升級/轉用 Linux
Windows 7 系統太卡怎麼辦?八大深度優化技巧徹底解決卡頓、提升速度
Win10 家庭版升級專業版/企業版圖文教程(以 10120 為例,含金鑰)
升級 Win10 後 C 槽空間暴減、開機變慢?清理 windows.old 與 IE 暫存檔立即釋放 20 GB 以上空間