在 Windows 7 上透過 PuTTY 以 SSH 協定遠端管理 Ubuntu Linux,是系統管理員與開發者的基本功。本文完整記錄從 Ubuntu 安裝 OpenSSH Server、啟動服務、驗證連線、Windows 端 PuTTY 設定到成功登入的全過程,含指令與畫面對照。
開啟終端機,輸入:
sudo apt-get update
sudo apt-get install openssh-server
安裝過程會自動產生 RSA/DSA/ECDSA 金鑰並啟動 ssh 服務。
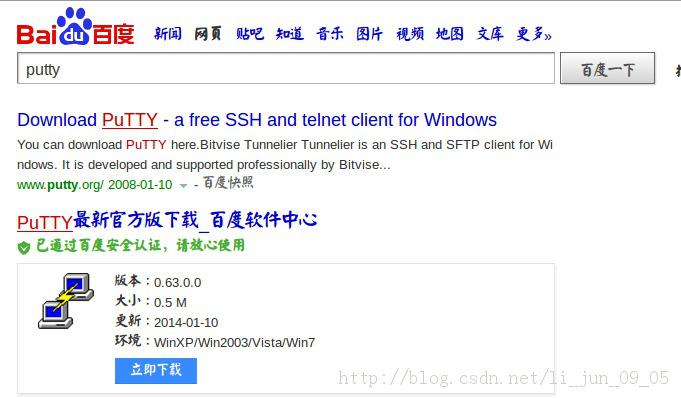
ps -e | grep ssh
# 輸出應包含 sshd 行,代表服務正在執行
sudo service ssh status
# 或 systemctl status ssh (較新版本)
ifconfig
# 或 ip addr show
# 尋找 inet 開頭的區域網路 IP (如 192.168.x.x 或 10.x.x.x)
開啟命令提示字元,ping Ubuntu IP:
ping 192.168.1.100  (替換為實際 IP)
# 回應正常代表網路通暢
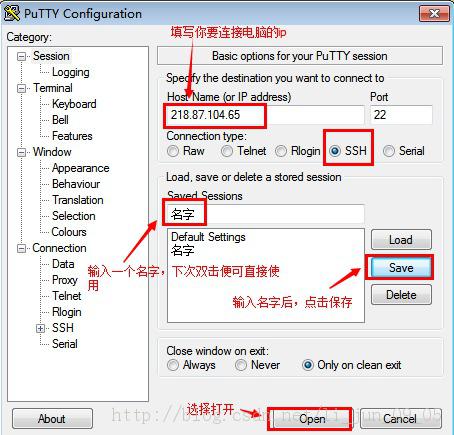
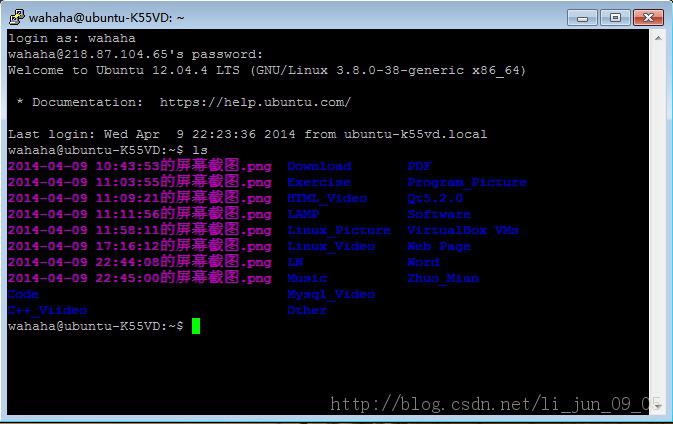
Ubuntu-Server) → 點擊 Save 儲存wahaha) 按 Enter,再輸入密碼 (輸入時不顯示字元) 按 Enter。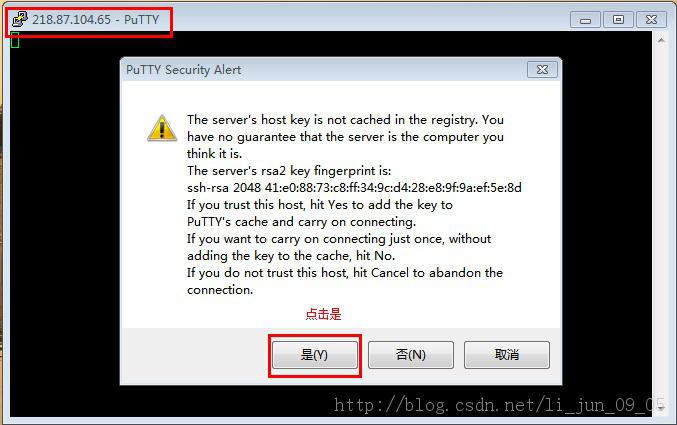
| 現象 | 可能原因 | 解決方向 |
|---|---|---|
| Connection refused / Network error | SSH 服務未啟動、防火牆封鎖 22 埠、IP 錯誤 | Ubuntu 執行 sudo service ssh start;檢查 ufw status 或 iptables;確認 IP |
| Access denied / Permission denied | 帳號/密碼錯誤、Root 登入被禁止、鍵盤配置不同 | 確認帳密;/etc/ssh/sshd_config 檢查 PermitRootLogin;嘗試一般帳號登入後 su - |
| 連線逾時 | 網路不通、虛擬機網路模式錯誤 (NAT vs Bridge) | 虛擬機請用「橋接模式」讓 Ubuntu 取得實體網段 IP;確認 ping 通 |
.ppk) 與公鑰。mkdir -p ~/.ssh && chmod 700 ~/.ssh,將公鑰內容追加至 ~/.ssh/authorized_keys,chmod 600 authorized_keys。.ppk 檔。完成上述設定,您即可從 Windows 7 安全、高效地遠端管理 Ubuntu 伺服器,進行指令操作、檔案傳輸 (搭配 WinSCP/PSCP) 等各項維運工作。