前置準備
建立虛擬機步驟
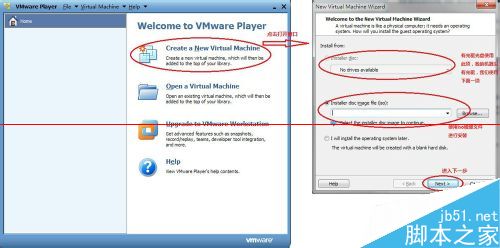
- 開啟 VMware Player → 點擊 「Create a New Virtual Machine」。
- 選擇安裝來源:
▸ Installer disc (實體光碟) 或
▸ Installer disc image file (iso) → Browse 選擇 ISO 檔 → Next。
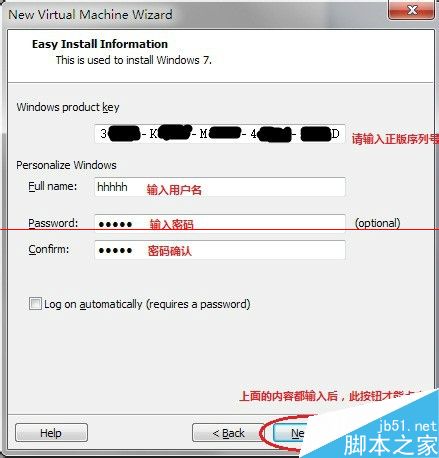
若偵測到 ISO 為 Windows 7,會顯示「Easy Install」資訊頁。
- Easy Install 資訊:輸入序號、使用者名稱、密碼 (可留空) → Next。
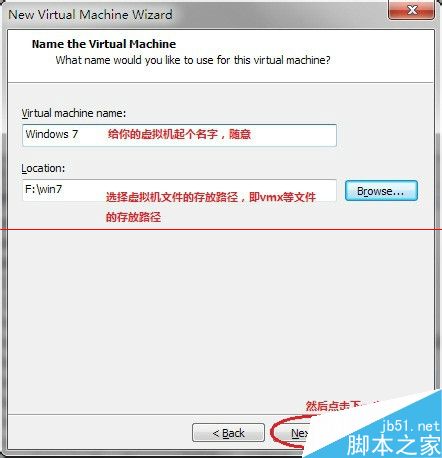
- 虛擬機名稱與位置:自訂名稱 (如 Win7_x64_Pro) → 選擇儲存資料夾 (建議機械硬碟非系統盤,空間充足處) → Next。
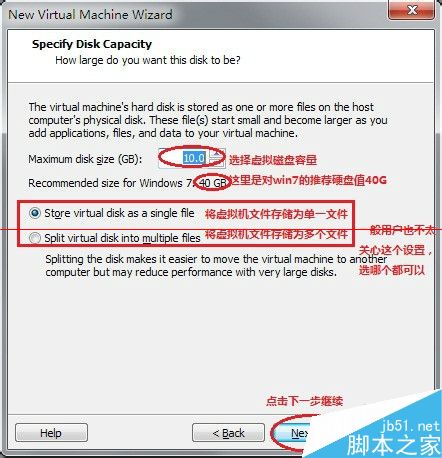
- 磁碟容量:建議 ≥ 40 GB (Win7 官方建議) → 選擇「Store virtual disk as a single file」 (單一大檔,效能略優) 或「Split into multiple files」 (便於移動備份) → Next。
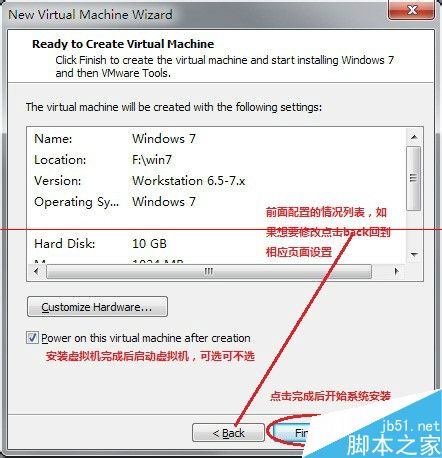
- 硬體自訂 (可選):點擊「Customize Hardware」可調整記憶體、處理器核心數、網路模式 (NAT/橋接)、顯示記憶體、USB 控制器等 → Close。
- 確認摘要頁面 → 勾選「Power on this virtual machine after creation」 → Finish 開始安裝。
安裝過程與完成
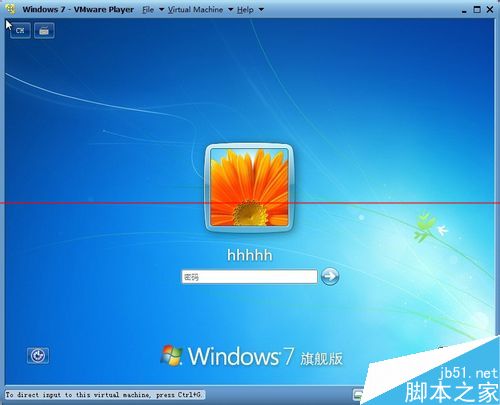
安裝過程與實體機相同:展開檔案 → 安裝功能 → 安裝更新 → 完成設定 → 重新開機數次 → 進入桌面。輸入密碼登入即可使用。
圖片資訊
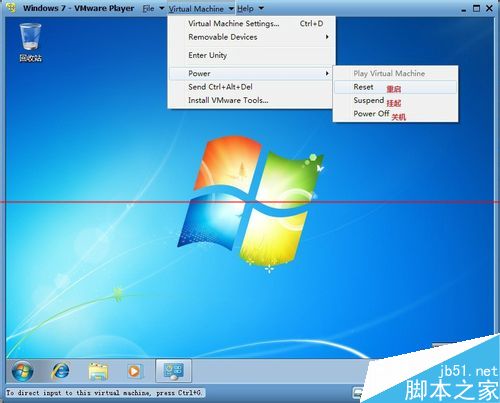
虛擬機電源管理
- Power Off (關機):相當於實體機關機,下次開機走完整 POST。
- Suspend (暫停/掛起):相當於待機/休眠,將記憶體內容寫入硬碟,下次從暫停點瞬間恢復,適合頻繁切換宿主機作業。
後續優化建議
- 安裝 VMware Tools (選單 → Virtual Machine → Install VMware Tools):啟用拖放檔案、複製貼上共用剪貼簿、自動調整解析度、啟用 3D 加速。
- 快照功能:重大變更前建立快照,失敗秒級回滾。
- 啟用 UEFI 開機 (虛擬機設定 → Options → Advanced → Firmware type: UEFI) 以支援 Win10/Win11 安裝。
相關延伸閱讀