Windows 8/8.1 安裝映像採用 install.wim 格式,傳統解壓軟體(WinRAR、7-Zip 早期版本)無法正確處理,會報告檔案損毀。此時可使用系統內建的 DISM (Deployment Image Servicing and Management) 指令進行掛載與解壓,支援多版本映像選擇。
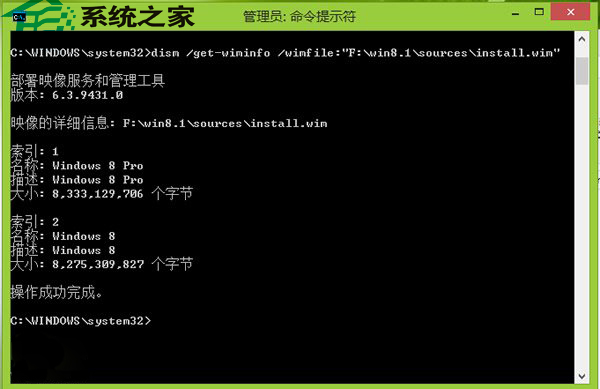
install.wim 路徑(例如 F:\win8.1\sources\install.wim)與目標解壓資料夾(例如 C:\111)已存在。dism /get-wiminfo /wimfile:"F:\win8.1\sources\install.wim"輸出會列出映像包含的版本,例如:
記下所需版本的 索引號(如專業版為 1)。
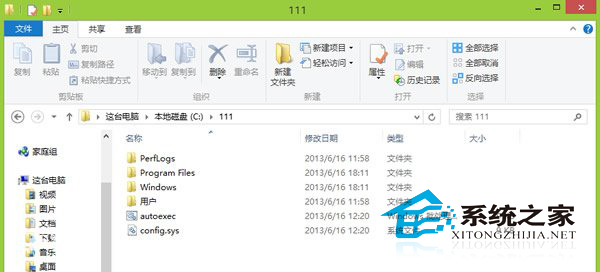
dism /mount-wim /wimfile:"F:\win8.1\sources\install.wim" /index:1 /mountdir:C:\111/index:1 為步驟一查到的版本索引。/mountdir:C:\111 為解壓目標資料夾(需預先建立)。執行完成後,開啟 C:\111 即可看到完整的 Windows 系統檔案結構,可自由複製所需檔案。
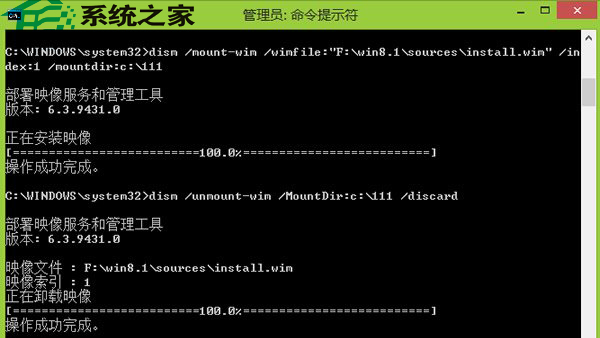
dism /unmount-wim /MountDir:C:\111 /discardC:\111 的視窗/程式。/discard 參數表示捨棄變更(唯讀解壓無變更時使用)。若曾修改映像內檔案需提交變更,改用 /commit。卸載完成後,C:\111 變為空資料夾,映像檔資源釋放。
DISM 亦可用於修復元件庫、清理 WinSxS 備份、啟用/停用 Windows 功能等,是 Windows 系統維護的核心工具。