Windows 7 自動維護(安全掃描、診斷、更新等)預設每日執行,常在使用高峰期佔用大量 CPU/磁碟,導致電腦卡頓。透過「工作排程器」可徹底停用相關任務,改為手動定期維護。
工作排程器程式庫 → Microsoft → Windows → TaskScheduler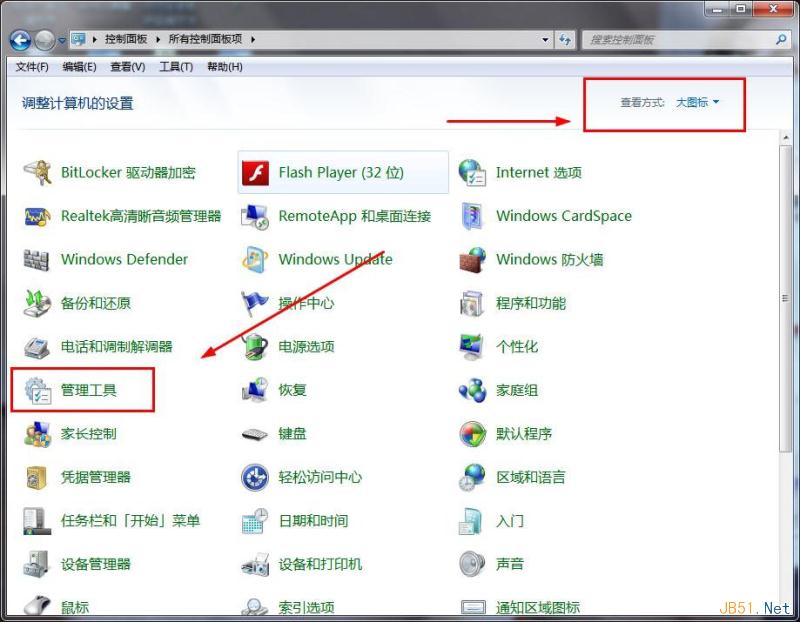
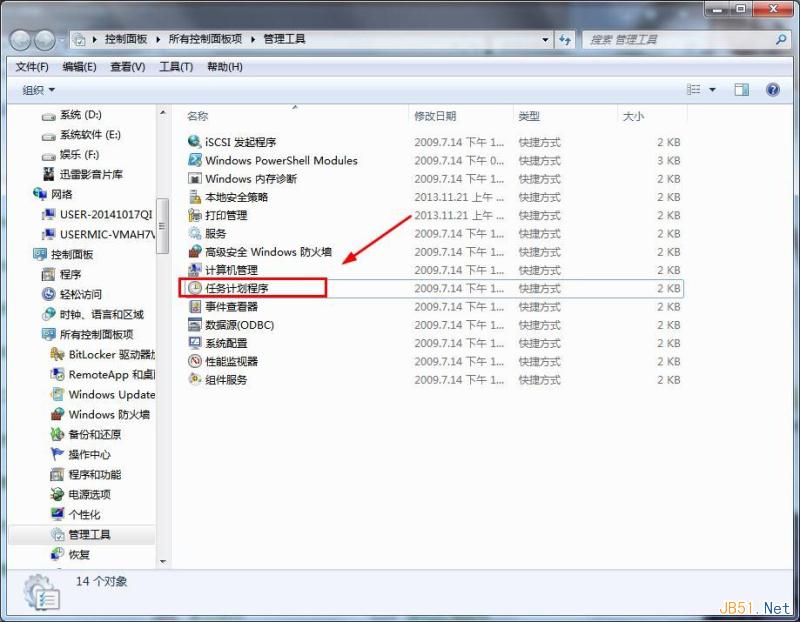
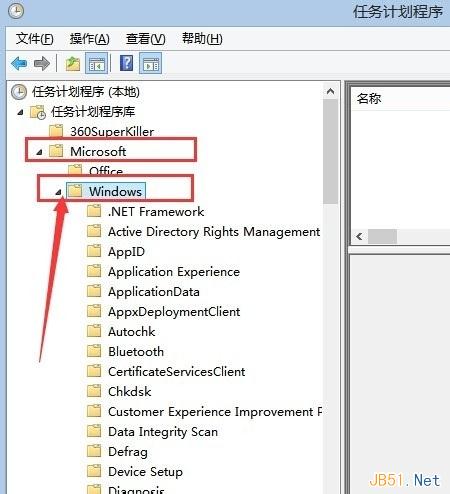
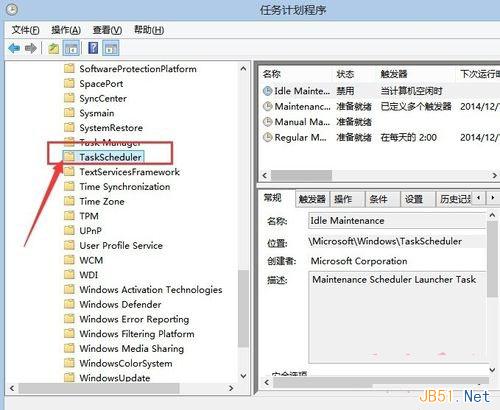
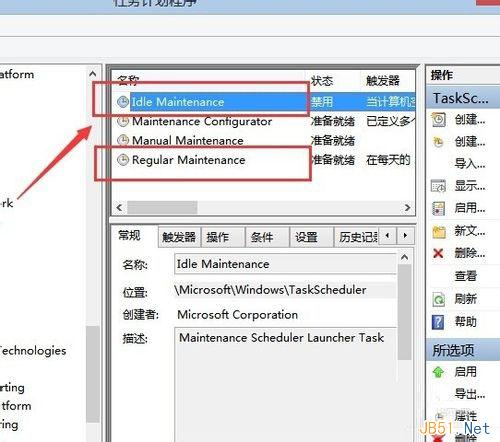
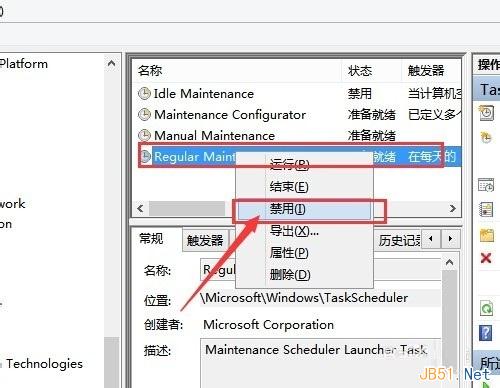
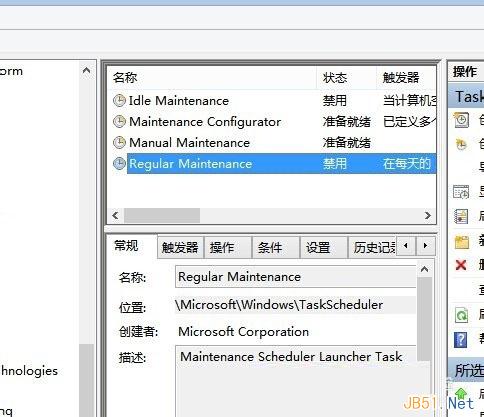
關閉每日自動維護,讓電腦資源專注於您的工作,需要時再手動保養。
Win10 開機顯示「client mac addr...」網卡開機提示?BIOS 關閉網路開機並調整硬碟優先序
Win7 控制台找不到「網路連線」選項?實為「網路和共用中心」→「設定新的連線或網路」入口變更
USB 安裝 Win8.1 提示「無法開啟 install.wim」0x8007000B?USB 必須格式化為 NTFS
盜版 Windows XP/7/8/8.1 免費升級 Windows 10 免激活直接用
Win10 如何關閉 IE11 瀏覽器?控制台關閉 Windows 功能教學
Win7/Win8 IE 瀏覽器無法下載檔案?7 大排查方案:從網路連線到下載管理器逐一擊破