核心概念
Metro 應用程式圖示儲存於 C:\Program Files\WindowsApps\<套件名稱>\Images 或 Resources 等資料夾,需取得資料夾權限後才能替換 PNG 檔案。
步驟 1:取得 WindowsApps 資料夾權限
- 開啟檔案總管,勾選「檢視」>「隱藏項目」顯示
WindowsApps。
- 右鍵
WindowsApps >「內容」>「安全性」>「編輯」>「新增」。
- 輸入目前使用者名稱 (或
Everyone) >「檢查名稱」> 確定。
- 選取該使用者,勾選「完全控制」> 套用 > 確定。
步驟 2:定位目標應用程式圖示資料夾
- 資料夾命名格式:
發布者.應用程式名稱_版本_架構_雜湊。
- 範例:
QQ音樂 → TencentAmericaLLC.QQMusic_1.0.1.24_x64__jrzdzdkm2tqyt\Images
QQ → TencentAmericaLLC.QQ_1.1.0.303_x64__jrzdzdkm2tqyt\Resources
步驟 3:替換圖示檔案
- 使用 Photoshop 等工具製作 310 × 150 px (寬磁貼) 或 150 × 150 px (方形磁貼) PNG 檔案,透明背景。
- 將原圖示檔案備份 (改名加
.bak),再複製新檔案同名覆蓋。
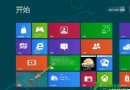
- 回到開始畫面,右鍵該應用程式 >「縮小」> 再右鍵 >「放大」強制重新整理磁貼快取。
注意事項
- 應用程式更新後圖示會被還原,需重新替換。
- 修改系統核心應用程式 (如商店、設定) 可能導致簽章驗證失敗,建議僅美化第三方應用程式。
- Windows 8.1/10 同樣適用,但資料夾結構可能略有不同。