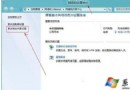
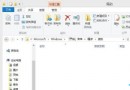
Windows 8 應用商店下載/更新應用程式時彈出錯誤代碼 0x80073CF9,嘗試建立 C:\Windows\AppInstallAgent 資料夾仍無效,導致無法安裝任何新應用。
此錯誤通常由 Spupdsvc.exe(Windows Update 共用服務元件)損毀、版本不符、或相關系統資料夾遺失(AppReadiness、AUInstallAgent、WindowsApps)引起。
cmd /c ren %systemroot%\System32\Spupdsvc.exe Spupdsvc.old → Enter。C:\Windows\System32 確認是否存在 Spupdsvc.exe,存在則手動重命名為 Spupdsvc.old。sfc /scannow → Enter,等待掃描修復完成(需數分鐘)。依序檢查並建立以下資料夾(不存在才建立):
C:\Windows\AppReadinessC:\Windows\AppInstallAgent(或 AUInstallAgent)C:\Program Files\WindowsApps※ 建立後需確保 TrustedInstallerSYSTEM、Administrators 至少有讀取/執行權限。
services.msc)重新啟動:依序執行上述步驟,多數情況可解決 0x80073CF9 錯誤,應用商店恢復正常下載/更新功能。
Get-AppXPackage -AllUsers | Foreach {Add-AppxPackage -DisableDevelopmentMode -Register "$($_.InstallLocation)\AppXManifest.xml"}DISM /Online /Cleanup-Image /RestoreHealth 修復元件存放區。0x80073CF9 核心在於 Spupdsvc.exe 異常與系統資料夾缺失,按「重命名 Spupdsvc.exe → SFC 掃描 → 補齊資料夾 → 重啟更新服務」四步驟操作,成功率極高。