Eclipse 預設字型對高解析度螢幕或視力需求者往往過小。Win7 環境下調整 Eclipse 編輯器、檢視視圖、主控台等區域字型大小與風格,只需幾步即可完成,且設定會永久保存。
操作步驟
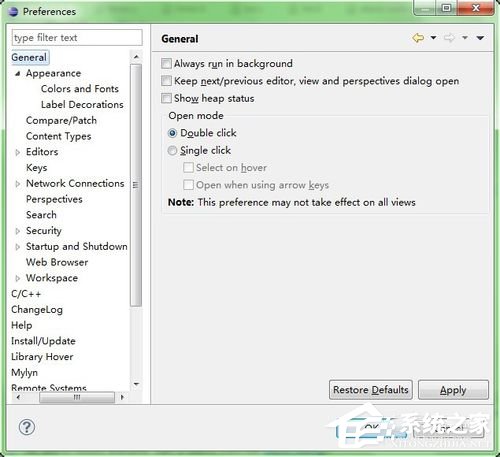
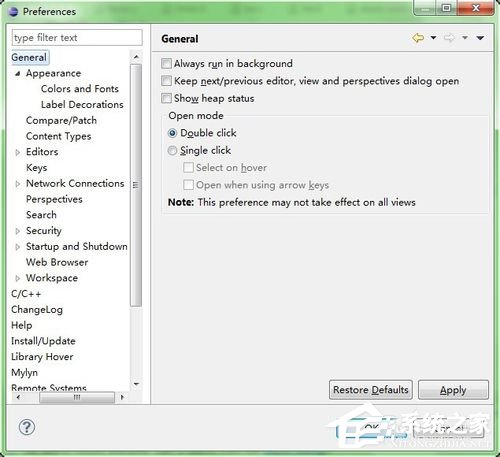
- 開啟 Eclipse,選單列點選 Window (視窗) → Preferences (偏好設定)。
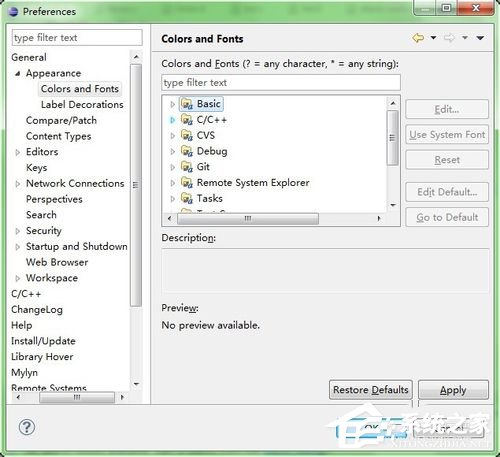
- 左側樹狀目錄依序展開:General (一般) → Appearance (外觀) → Colors and Fonts (顏色和字型)。
- 右側清單中,展開 Basic (基本) 類別。
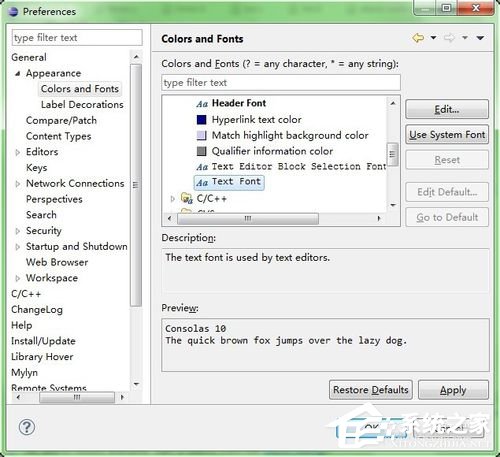
- 找到並選取 Text Font (文字字型) (通常位於 Basic 最底部)。
- 右側 Edit (編輯) 按鈕會亮起,點擊它。
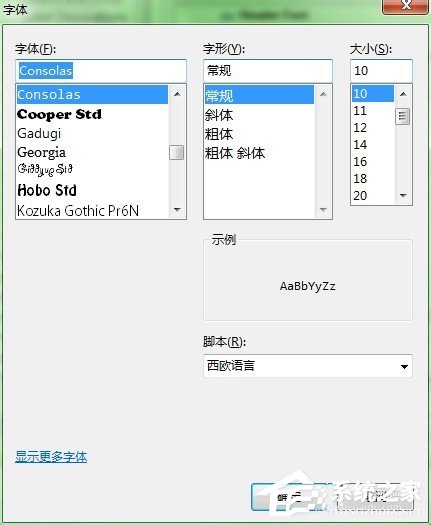
- 在彈出的字型選擇對話框中,自由設定 字型 (如: 微軟正黑體, Consolas, Monospaced)、樣式 (粗體/斜體)、大小 (建議 12~14pt)。
- 點選 OK 確定,再於 Preferences 視窗連續點選 Apply and Close 或 OK 返回主介面,字型即時生效。

進階建議:區分「編輯器」與「視圖」字型
- Text Font 影響範圍最廣 (編輯器、Package Explorer、Console、Output 等)。
- 若僅想調整**程式碼編輯區**,可在 Colors and Fonts 中展開 Java (或其他語言) → Java Editor Text Font 獨立設定。
- 主控台字型可在 Debug / Run/Debug → Console font 設定。
高 DPI 螢幕 (4K/Retina) 補充
Win7 對高 DPI 支援有限。若調整字型後介面其他元素 (圖示、工具列) 仍過小,可嘗試:
- Eclipse 安裝目錄下
eclipse.ini 加入:-Dswt.autoScale=100 (或 200)。
- 或右鍵 eclipse.exe → 內容 → 相容性 → 變更高 DPI 設定 → 勾選「覆寫高 DPI 縮放行為」→ 選「系統」。
- 建議升級至較新版 Eclipse (2020-06 以降) 並搭配 Java 11+,高 DPI 支援大幅改善。
設定完成後,你的程式碼閱讀體驗將顯著提升,眼睛也會感謝你!