Visual Studio Emulator for Android 是微軟推出的獨立版 Android 模擬器,效能優於 Google 官方模擬器,支援 Hyper-V 虛擬化,可整合 Android Studio 進行開發測試。本文提供從 Hyper-V 啟用、模擬器安裝、Android Studio 整合到工具列快捷鍵設定的完整教學。
前置需求
- Windows 10 專業版/企業版/教育版(家庭版不支援 Hyper-V)
- CPU 支援虛擬化技術 (Intel VT-x / AMD-V) 且 BIOS 已啟用
- 至少 8GB 記憶體(建議 16GB+)
- SSD 硬碟(模擬器映像檔與虛擬機檔案較大)
步驟一:啟用 Hyper-V
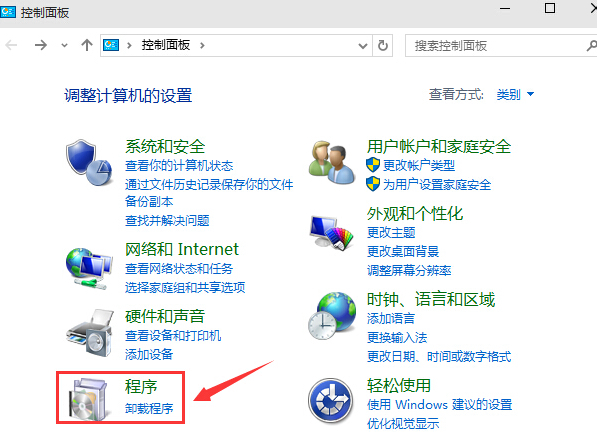
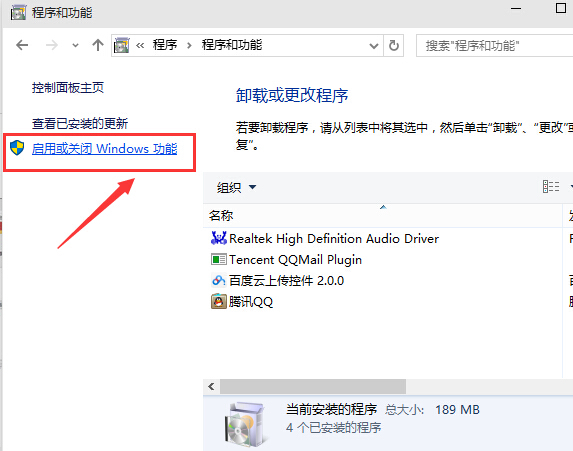
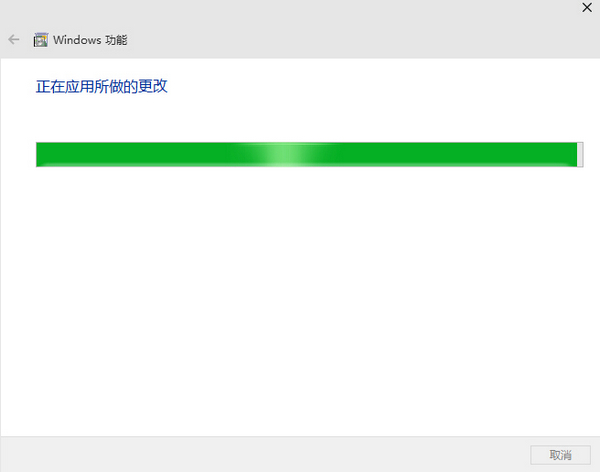
- 「控制台」→「程式集」→「開啟或關閉 Windows 功能」
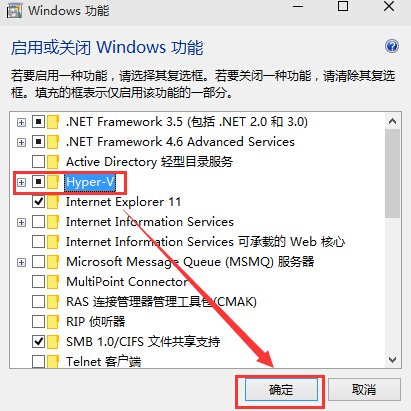
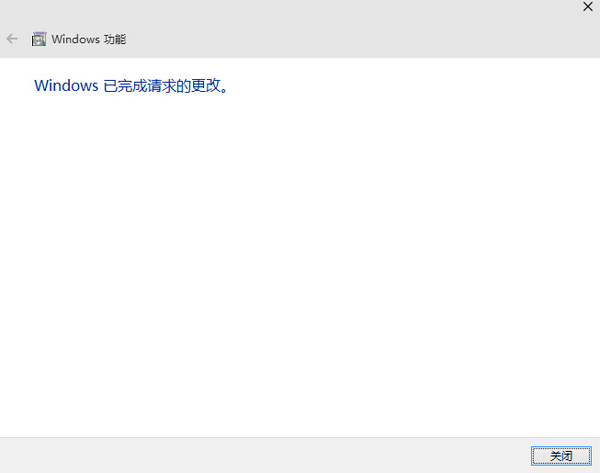
- 勾選「Hyper-V」→ 確定 → 重新開機
步驟二:下載安裝模擬器
- 下載
vs_emulatorsetup.exe(約 40MB,不含映像檔)
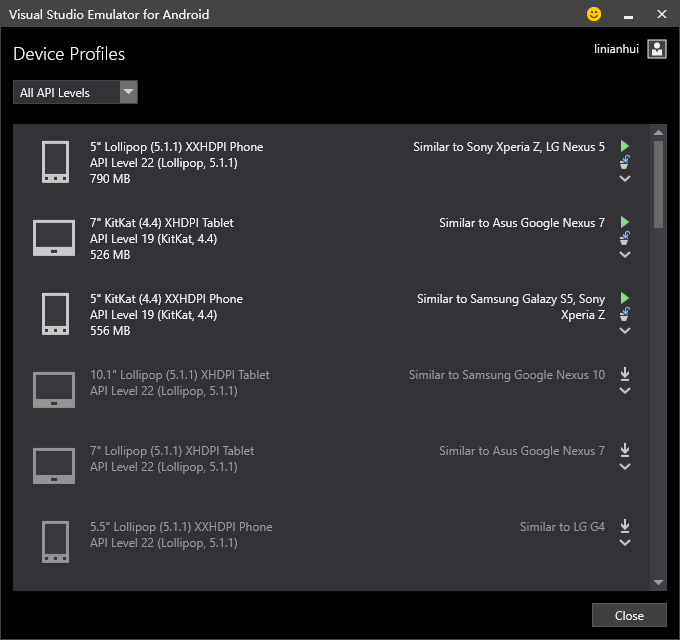
- 執行安裝,預設會線上下載 API 19 (Android 4.4) x86 映像檔
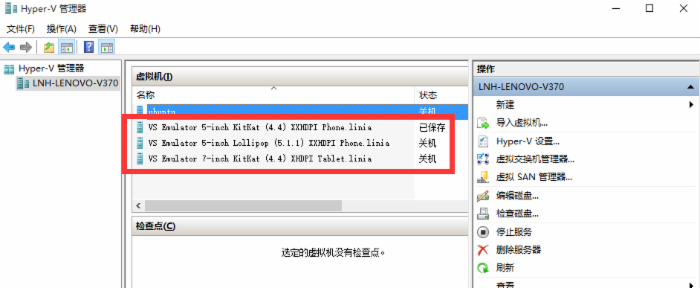
- 安裝完成必須重新開機(加入 Hyper-V Administrators 群組生效)
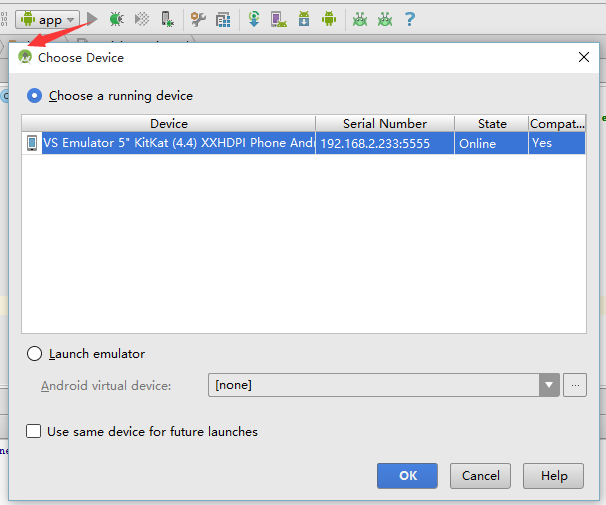
步驟三:Android Studio 整合設定
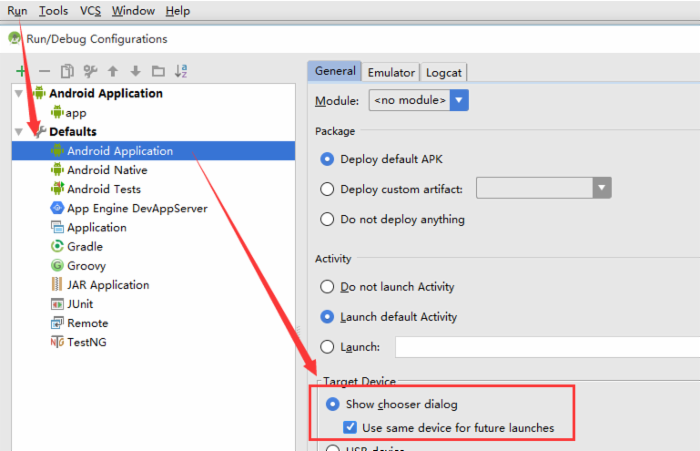
- 開啟 Android Studio → Run → Edit Configurations
- Defaults / Android Application / General → Target Device 勾選:
- Show chooser dialog
- Use same device for future launches
- 點選 Apply、OK
步驟四:建立工具列快捷按鈕(一鍵啟動/連線模擬器)
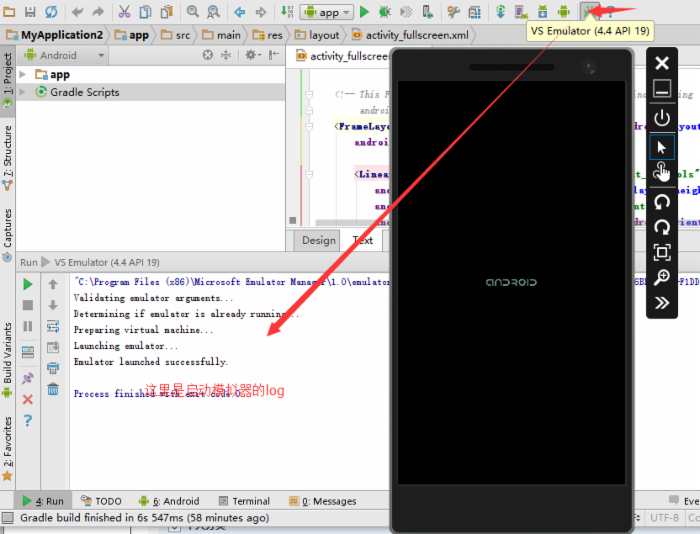
4-1 啟動模擬器按鈕
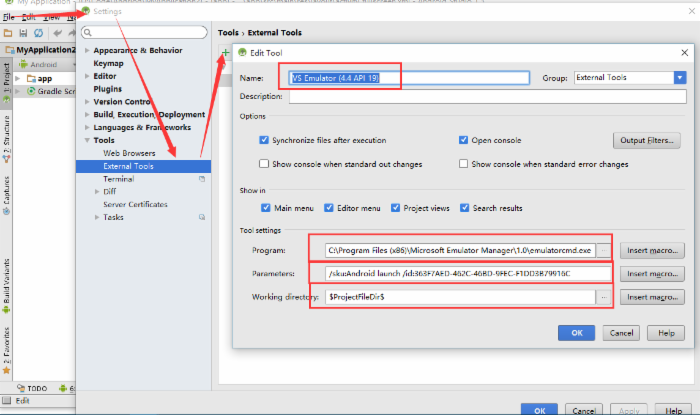
- File → Settings → External Tools → Add
- Name:
VS Emulator (4.4 API 19)
- Program:
C:\Program Files (x86)\Microsoft Emulator Manager\1.0\emulatorcmd.exe
- Parameters:
/sku:Android /id:{你的模擬器GUID}
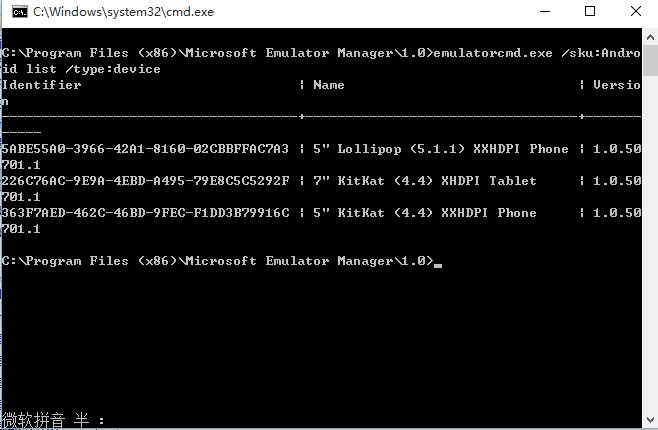
(GUID 可用 emulatorcmd.exe /sku:Android list /type:device 取得)
- Working Directory:
$ProjectFileDir$
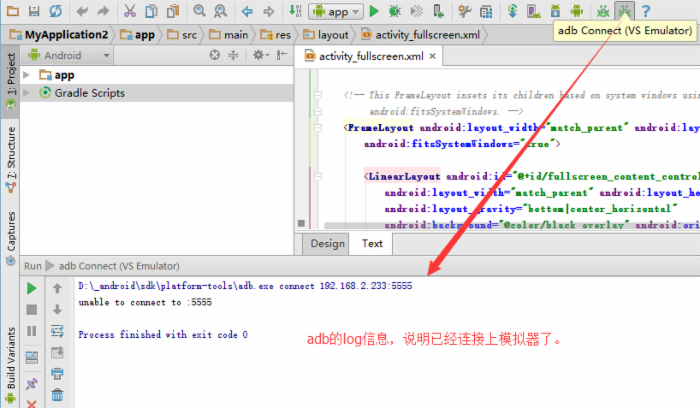
4-2 ADB 連線模擬器按鈕
- Program:
adb.exe 完整路徑(如 D:\_android\sdk\platform-tools\adb.exe)
- Parameters:
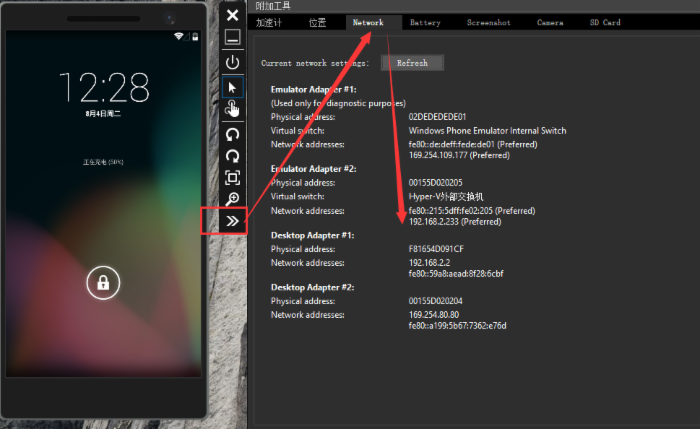
connect 192.168.x.x:5555(IP 從模擬器 Wi-Fi 設定查看)
4-3 加入工具列
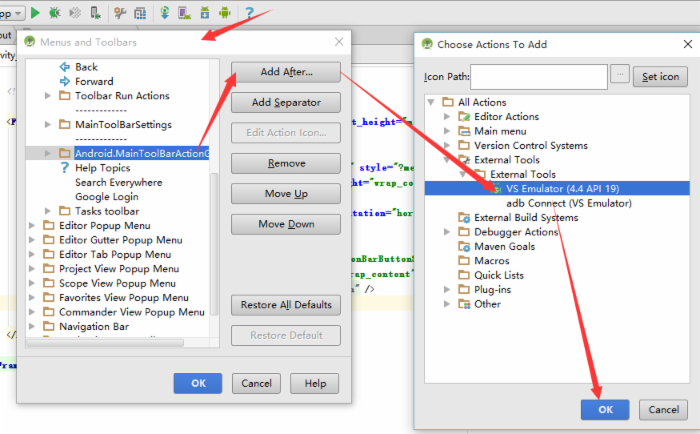
- 工具列右鍵 → Customize Menus and Toolbars → Main Toolbar → Add After → External Tools 選擇剛建立的工具
步驟五:自動化 Run 前執行啟動+連線
- Run → Edit Configurations → Defaults / Android Application / Emulator → Before Launch
- 加入剛建立的兩個 External Tool,順序:先啟動模擬器,再 ADB 連線
- Apply、OK
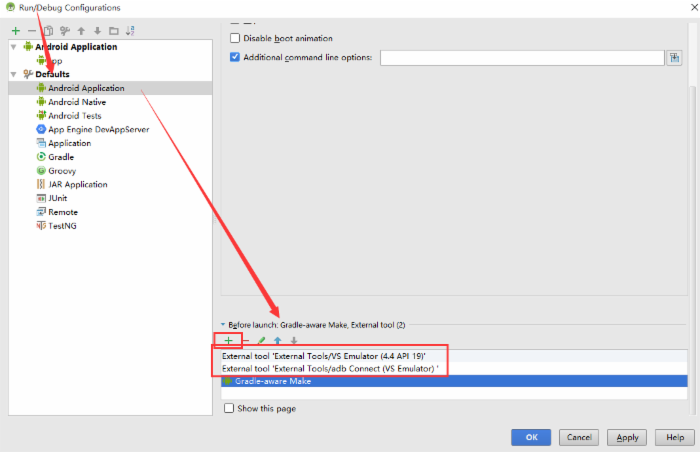
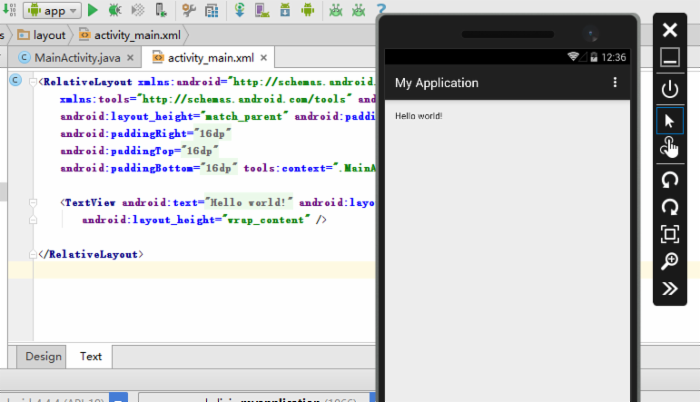
之後點選綠色 Run 箭頭即可自動完成:啟動模擬器 → ADB 連線 → 部署 App → 偵錯。
替代方案提醒
- Genymotion:VirtualBox 架構、效能優、免費個人版、支援 Win10 家庭版
- BlueStacks / Nox / LDPlayer:遊戲導向、支援 ARM 應用轉譯、適合一般用戶
- Google 官方模擬器:配合 HAXM 加速器、功能最完整、支援最新 API Level