許多剛接觸 C++ 的開發者在 Windows 10 上使用 Visual Studio 2010 時,常因找不到正確的專案範本而卡關。本文將以最經典的「Hello World」為例,手把手帶您從建立專案、新增原始碼到編譯執行,完整呈現 VS2010 開發 C++ 主控台應用程式的流程。
建立 Win32 主控台應用程式專案
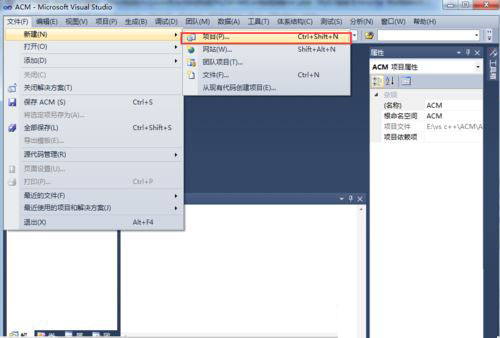
- 開啟 Visual Studio 2010,點選選單列「檔案」→「新增」→「專案」。
- 在「新增專案」視窗左側選擇「Visual C++」→「Win32」,右側選取「Win32 主控台應用程式」,輸入專案名稱與儲存位置,按下「確定」。
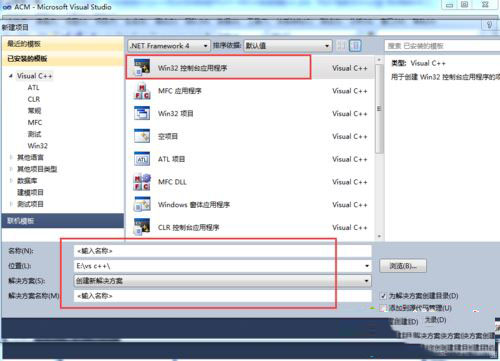
設定應用程式精靈為空白專案
- 出現「Win32 應用程式精靈」,直接點選「下一步」。
- 在「應用程式設定」頁面,勾選「空白專案」,再按「完成」。
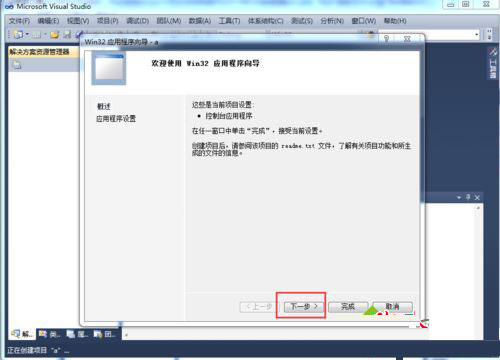
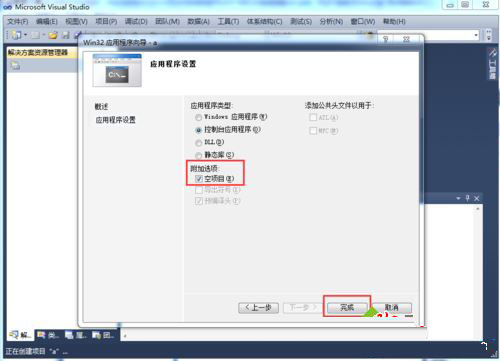
新增 C++ 原始碼檔案
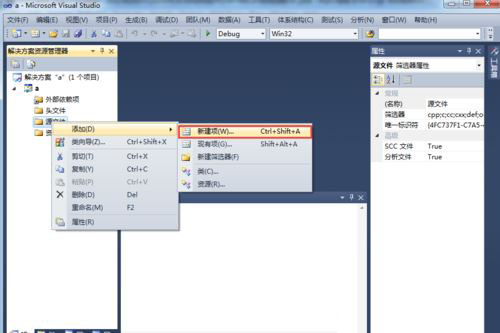
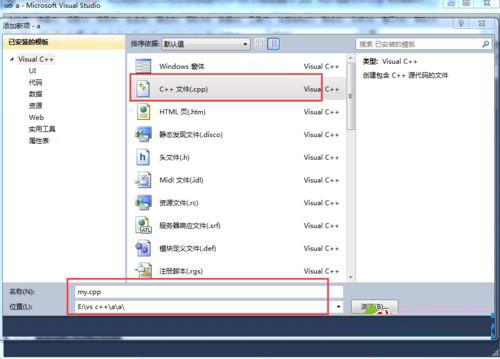
- 在「方案總管」中,於「原始程式檔」資料夾右鍵選擇「加入」→「新增項目」。
- 選擇「Visual C++」→「C++ 檔案」,輸入檔名(如
main.cpp),按下「加入」。
撰寫與執行 Hello World 程式碼
在編輯器中輸入以下程式碼:
#include <iostream>

int main() {
    std::cout << "Hello World" << std::endl;
    return 0;
}
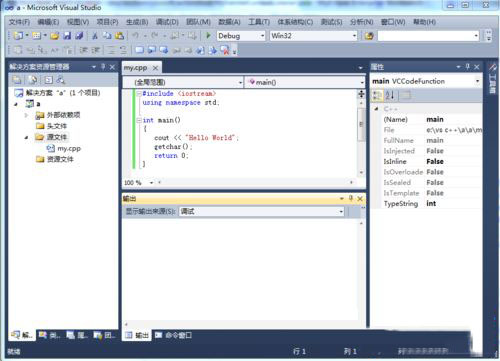
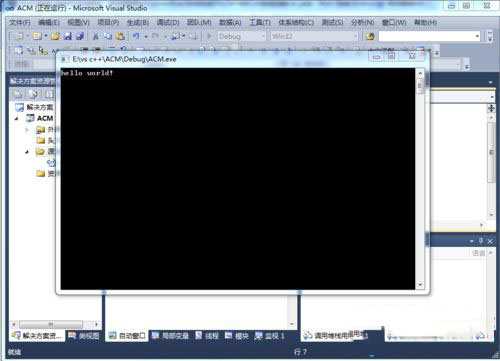
- 點選工具列上的「啟動偵錯」綠色三角形按鈕(或按 F5)。
- 主控台視窗將顯示 Hello World,代表編譯執行成功。
常見問題提示
- 若找不到「Win32 主控台應用程式」範本,請確認 VS2010 安裝時已勾選「C++」開發元件。
- 專案屬性中「字元集」建議設為「使用多位元組字元集」以相容舊版程式碼。
小結
透過上述步驟,您已在 Windows 10 上成功使用 Visual Studio 2010 建立並執行第一支 C++ 程式。後續可嘗試加入更多標準庫、練習輸入輸出與控制流程,逐步掌握 C++ 開發基礎。