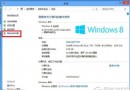
Windows 8.1 Update 推出全新 WIMBoot (Windows Image Boot) 安裝模式:不解壓縮 WIM 映像檔即可直接啟動系統,C 槽佔用空間從傳統 7GB 降至約 4GB,極大緩解小容量 SSD(32GB/64GB)平板、超輕筆電的儲存壓力。
WIMBoot 原理
- 傳統安裝:將 `install.wim` 內所有檔案解壓至 C 槽,佔用完整空間。
- WIMBoot:保留 `install.wim` 為壓縮狀態,系統執行時即時從 WIM 讀取檔案,僅需少量臨時空間。
部署流程(針對 OEM/進階用戶)
- 準備已整合 Windows 8.1 Update 的安裝映像。
- 使用 DISM 匯出、優化映像:
dism /Export-Image /SourceImageFile:install.wim /SourceIndex:1 /DestinationImageFile:install_wimboot.wim /Compress:recovery /WIMBoot
- 升級 Windows PE 與 DISM 至支援 WIMBoot 版本(需 Windows ADK for Windows 8.1 Update)。
- 在目標裝置以優化後映像進行 WIMBoot 部署。

適用對象與限制
- 適用:32GB/64GB eMMC/SSD 平板、超輕筆電、嵌入式裝置。
- 不適用:傳統機械硬碟、大容量 SSD(效能增益不明顯、且無法建立系統還原點)。
- WIMBoot 系統無法使用「系統還原」功能,需依賴「重設這台電腦」或映像備份。
未來展望
WIMBoot 技術為後續 Windows 10 緊湊安裝、Windows 11 壓縮系統奠定基礎,是微軟針對儲存裝置小型化趨勢的關鍵佈局。