前言
安裝 Windows 7/8 雙系統後,若決定移除 Windows 8 保留 Windows 7,需依序:設定 Windows 7 為預設開機、刪除 Windows 8 開機項目、格式化 Windows 8 分區。本文提供完整圖文流程。
移除步驟
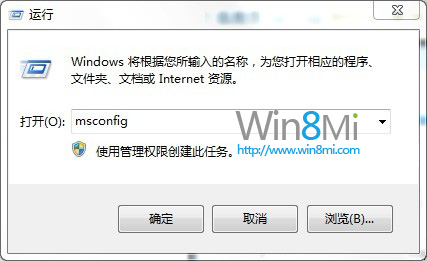
- 進入 Windows 7 系統,按 Win+R → 輸入
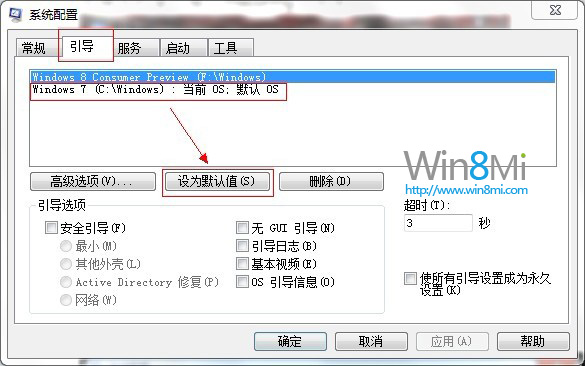
msconfig → 「開機」索引標籤。
- 選取「Windows 7」 → 「設為預設」。
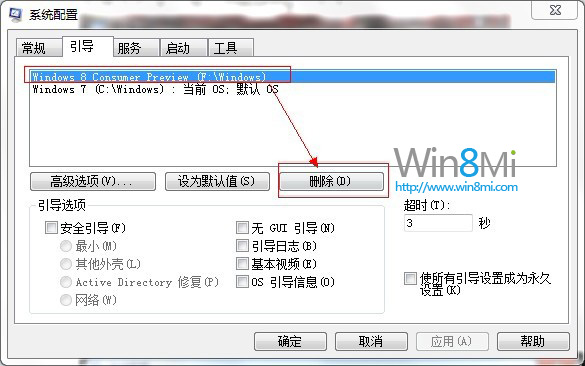
- 選取「Windows 8 Consumer Preview」 → 「刪除」。
- 「確定」重新開機,確認直接進入 Windows 7 無開機選單。
- 進入 Windows 7,「這台電腦」→ 右鍵 Windows 8 所在分區 → 「格式化」 → 選擇 NTFS、快速格式化 → 「開始」。
警告: 格式化前請備份該分區重要資料。
後續檢查
- 開啟「磁碟管理」(Win+X → 「磁碟管理」),確認原 Windows 8 分區顯示為「健康 (基本資料分區)」,可重新命名、存放資料。
- 若開機仍殘留選單,重複 msconfig 步驟清理。
結語
「設為預設 → 刪除開機項目 → 格式化分區」三步驟乾淨移除 Windows 8,恢復純淨 Windows 7 環境。操作前務必備份資料,避免誤刪造成遺憾。