WinPE (Windows Preinstallation Environment) 是輕量級部署/維護環境。本文教導如何整合 Windows 8.1 Update (KB2919355 等) 至 WinPE 5.0,升級為支援 WIMBoot 等新特性的 WinPE 5.1,並封裝為 ISO 或 USB 開機媒體。
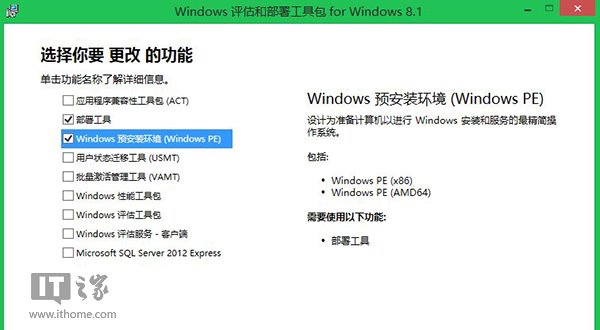
C:\MSU 放置更新套件,C:\WinPE_amd64 作為輸出目錄。copype amd64 C:\WinPE_amd64Dism /Mount-Image /ImageFile:"C:\WinPE_amd64\media\sources\boot.wim" /index:1 /MountDir:"C:\WinPE_amd64\mount"Dism /Add-Package /PackagePath:C:\MSU\Windows8.1-KB2919442-x64.msu /Image:C:\WinPE_amd64\mount /LogPath:AddPackage.logDism /Add-Package /PackagePath:C:\MSU\Windows8.1-KB2919355-x64.msu /Image:C:\WinPE_amd64\mount /LogPath:AddPackage.logDism /Add-Package /PackagePath:C:\MSU\Windows8.1-KB2932046-x64.msu /Image:C:\WinPE_amd64\mount /LogPath:AddPackage.log
Dism /image:C:\WinPE_amd64\mount /Cleanup-Image /StartComponentCleanup /ResetBaseDism /Unmount-Image /MountDir:"C:\WinPE_amd64\mount" /commitDism /Export-Image /SourceImageFile:C:\WinPE_amd64\media\sources\boot.wim /SourceIndex:1 /DestinationImageFile:C:\WinPE_amd64\media\sources\boot2.wimdel C:\WinPE_amd64\media\sources\boot.wim && ren C:\WinPE_amd64\media\sources\boot2.wim boot.wimMakeWinPEMedia /ISO C:\WinPE_amd64 C:\WinPE_amd64\WinPE_amd64.iso完成後的 WinPE 5.1 支援 WIMBoot (Windows Image File Boot) 技術,可大幅減少部署映像佔用空間,適合現代精簡部署需求。