Windows XP Windows 7 Windows 2003 Windows Vista Windows 綜合教學 Linux 系統教學
Windows 10 Windows 8 Windows 2008 Windows NT Windows Server 電腦軟體教學

Win8.1 「SecureBoot 未正確設定」水印解決方案:BIOS 重置金鑰與 UEFI 模式切換

編輯:Windows 8 系統介紹

升級 Win8.1 後桌面右下角出現「SecureBoot 未正確設定 build 9600」水印,主因 BIOS Secure Boot 狀態與系統不符。提供兩種 BIOS 模式對應解決方案。

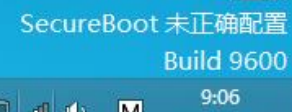
現象

桌面右下角持續顯示半透明水印,不影響功能但極度干擾視覺。

SecureBoot水印

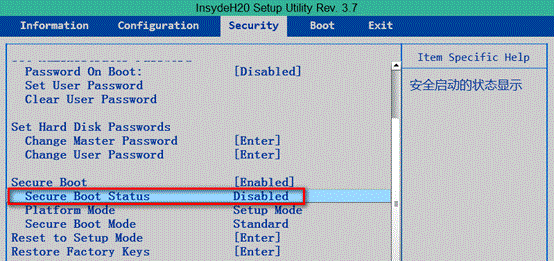
第一類 BIOS:傳統 Security 選單模式

  1. 重開機連續敲 F2 或 Del 進入 BIOS。
  2. 「Security」→「Reset to Setup Mode」→ Enter → 選「Yes」。
  3. 「Restore Factory Keys」→ Enter → 選「Yes」。
  4. F9 或 Fn+F9 載入預設值。
  5. F10 儲存離開 → 重新進入 BIOS 確認「Secure Boot Status」為「Enabled」。
  6. 進入系統水印消失。

BIOS Security選單

第二類 BIOS:Boot/Exit 選單模式 (Lenovo/ThinkPad 常見)

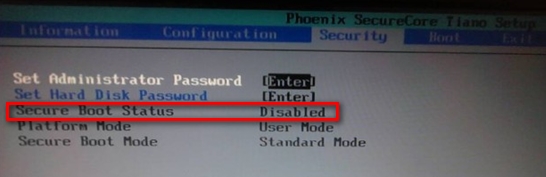
  1. 進入 BIOS →「Boot」→「Boot Mode」改「UEFI」。

BIOS Boot Mode UEFI

  1. 「Exit」→「OS Optimized Defaults」改「Windows 8 64-bit」。
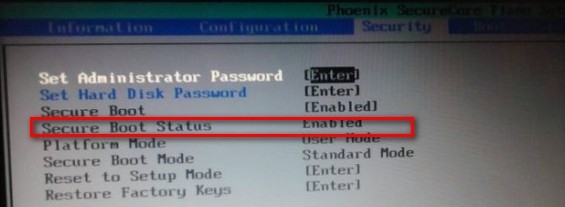
  2. F10 儲存離開 → 重新進入 BIOS 確認「Security」→「Secure Boot Status」為「Enabled」。

Secure Boot Status Enabled

  1. 進入系統水印消失。

核心原理

  • Secure Boot 需 UEFI 模式 + 平台金鑰 (PK/KEK/db/dbx) 正確載入。
  • Reset to Setup Mode 清除舊金鑰,Restore Factory Keys 重載廠方金鑰,配合 UEFI 模式即符合 Win8.1 驗證需求。
  • 不同廠商 BIOS 介面術語不同,核心動作一致:清金鑰 → 載廠方金鑰 → 確保 UEFI 模式。

依據主機板 BIOS 介面類型選擇對應方案,通常重置金鑰並確保 UEFI 模式即可徹底移除水印。

Copyright © Windows教程網 All Rights Reserved