官方 Apache 僅提供 32-bit Windows 版本。Win 7 x64 環境需使用 Blackdot.be 以 Visual Studio 2005 編譯的 64-bit 版本(httpd-2.2.13-win64.rar)。
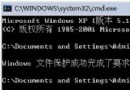
httpd-2.2.13-win64.rar 解壓至本地(如 D:/Web/Tool/httpd-2.2-x64)bin 目錄httpd -k install 註冊為 Windows 服務(顯示 The Apache2.2 service is successfully installed)conf/httpd.conf 修正 ServerRoot 指向正確安裝目錄(安裝時可能報錯 ServerRoot must be a valid directory,無視繼續手動修正即可)httpd -k start 啟動服務,無錯誤訊息即成功亦可先修好 httpd.conf 再執行 install/start。httpd -k install 會自動建立服務名為 Apache2.2,可在 services.msc 管理。
非官方編譯版雖非長久之計,但解決 Win 7 x64 早期無 64-bit Apache 燃眉之急,開發測試完全足夠。