利用 Windows AIK (現 ADK) 製作自動應答檔,可實現 Windows 7 無人值守部署。本文記錄學習心得與關鍵設定節點。
執行 sysprep /generalize /oobe /shutdown 重開機後,系統依序經歷:
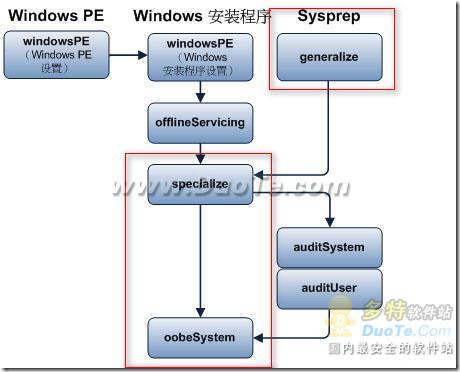
階段:specialize
元件:Microsoft-Windows-Shell-Setup
設定:CopyProfile = true
效果:將目前登入使用者的桌面捷徑、工作列釘選、資料夾視圖等個人化設定複製到 Default Profile,所有新建使用者繼承相同環境。
階段:specialize
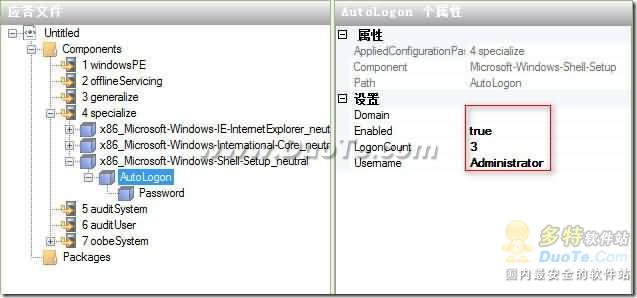
元件:Microsoft-Windows-Shell-Setup\AutoLogon
設定:
Enabled = true
Username = Administrator
LogonCount = 3 (自動登入次數)
Password (可留空或指定)
階段:oobeSystem
元件:Microsoft-Windows-Shell-Setup\OOBE
設定:
SkipMachineOOBE = true
SkipUserOOBE = true
HideEULAPage = true
HideWirelessSetupInOOBE = true
ProtectYourPC = 3 (建議設定:僅重要更新)
代價:犧牲 ProfilesDirectory、FirstLogonCommands、LogonCommands 等進階設定。
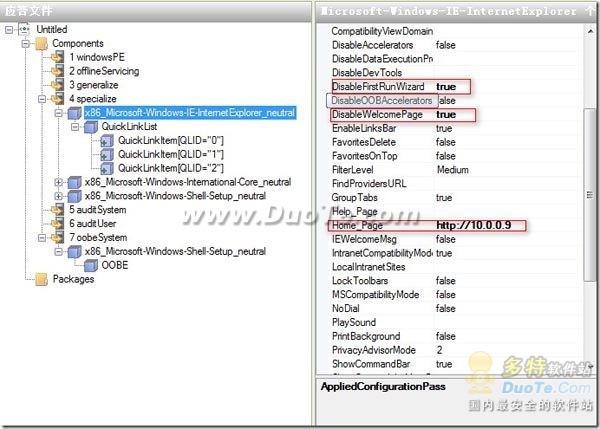
階段:specialize
元件:Microsoft-Windows-IE-InternetExplorer
可設定:首頁、搜尋提供者、快速連結、略過首次執行嚮導、隱私權設定等。
OOBE 階段可設定 ProfilesDirectory 將 C:\Users 導向非系統碟。若跳過 OOBE,能否在 specialize 階段透過「接管 Windows 部署」機制匯入登錄檔修改 HKLM\SOFTWARE\Microsoft\Windows NT\CurrentVersion\ProfileList\ProfilesDirectory 達成?尚待實測驗證。
安裝 Windows ADK,熟悉 Windows SIM (系統映像管理器) 介面,從範例應答檔入手,逐步加入所需自動化項目,反覆在虛擬機測試驗證。