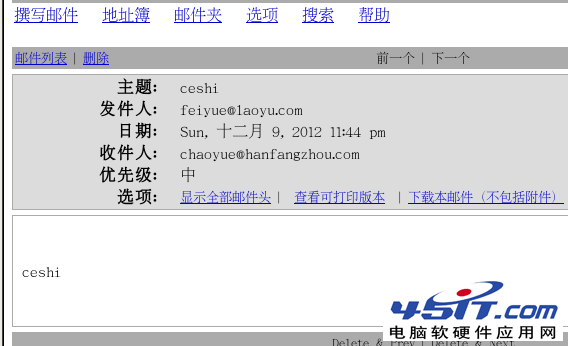
本文記錄在兩個不同網段(192.168.18.0/24 與 10.1.1.0/24)分別部署郵件服務器,並透過一台雙網卡 DNS 伺服器提供域名解析,實現跨網段郵件收發的完整過程。實驗涵蓋 DNS 區域配置、Postfix SMTP 認證與轉發、Dovecot POP3/IMAP、Cyrus IMAP 郵箱管理、SquirrelMail Webmail 等核心組件。
options {
    directory "/var/named";
};

zone "hanfangzhou.com" {
    type master;
    file "hanfangzhou.com.zone";
};

zone "laohu.com" {
    type master;
    file "laohu.com.zone";
};@ IN SOA @ root (
42 ; serial
3H ; refresh
15M ; retry
1W ; expiry
1D ) ; minimum
hanfangzhou.com. IN NS mail.hanfangzhou.com.
mail IN A 192.168.18.48
hanfangzhou.com. IN MX 10 mail.hanfangzhou.com.@ IN SOA @ root (
42 ; serial
3H ; refresh
15M ; retry
1W ; expiry
1D ) ; minimum
laohu.com. IN NS mail.laohu.com.
mail IN A 10.1.1.2
laohu.com. IN MX 10 mail.laohu.com.# 編輯 /etc/sysctl.conf
net.ipv4.ip_forward = 1
# 生效
sysctl -p
# 重啟 DNS
service named restartservice sendmail stop
chkconfig sendmail off
yum install postfix -ymyhostname = mail.hanfangzhou.com
mydomain = hanfangzhou.com
myorigin = $mydomain
inet_interfaces = all
mydestination = $myhostname, localhost.$mydomain, localhost
mynetworks = 192.168.18.0/24, 127.0.0.0/8
relay_domains = hanfangzhou.com# /etc/sysconfig/saslauthd
MECH=shadow
service saslauthd restart
# 建立測試用戶
useradd chaoyue
passwd chaoyue # 密碼設為 123
# 驗證 SASL
testsaslauthd -u chaoyue -p '123'
# 輸出 0: OK "Success." 即成功# 追加至 /etc/postfix/main.cf
smtpd_sasl_auth_enable = yes
smtpd_sasl_local_domain = ''
smtpd_recipient_restrictions = permit_mynetworks, permit_sasl_authenticated, reject_unauth_destination
broken_sasl_auth_clients = yes
smtpd_client_restrictions = permit_sasl_authenticated
smtpd_sasl_security_options = noanonymous
service postfix restart
chkconfig postfix on# Base64 編碼帳號密碼
perl -MMIME::Base64 -e 'print encode_base64("chaoyue");' # Y2hhb3l1ZQ==
perl -MMIME::Base64 -e 'print encode_base64("123");' # MTIz
telnet mail.hanfangzhou.com 25
auth login
Y2hhb3l1ZQ==
MTIz
# 回應 235 2.0.0 Authentication successfulyum install dovecot -y
# /etc/dovecot.conf
protocols = pop3 pop3s
protocol pop3 {
listen = *:10100
}
service dovecot restart
chkconfig dovecot onyum install cyrus-imapd cyrus-imapd-devel -y
# 修改 Postfix 投遞傳輸
# /etc/postfix/main.cf 第 456 行取消註釋
mailbox_transport = lmtp:unix:/var/lib/imap/socket/lmtp
service cyrus-imapd restart
chkconfig cyrus-imapd on
# 建立 Cyrus 管理密碼與用戶郵箱
passwd cyrus
cyradm -u cyrus localhost
# IMAP Password: 輸入剛設定的密碼
localhost.localdomain> cm user.chaoyue
localhost.localdomain> cm user.chaoyue.Send
localhost.localdomain> cm user.chaoyue.Trash
localhost.localdomain> cm user.chaoyue.Draftsyum install squirrelmail -y
/usr/share/squirrelmail/config/conf.pl # 依提示設定域名、IMAP/SMTP 伺服器
service httpd restart配置步驟與服務器 1 完全相同,僅需將域名、IP、網段對應修改為 laohu.com / 10.1.1.0/24 即可。