一、修改 Microsoft Virtual PC 虛擬機 BIOS
所需工具
- Microsoft Virtual PC 2004 (SP1 版本 5.3.582.27)
- ResScope 1.92(資源分析編輯工具)
- MMTool(AMI BIOS 模組編輯工具,免安裝)
- UltraEdit(十六進位編輯器)
操作步驟
- 備份主程式:複製安裝目錄下的
Virtual PC.exe 以防萬一。
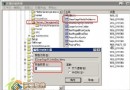
- 提取 BIOS 資源:用 ResScope 開啟
Virtual PC.exe,定位「BIOS」資源,匯出編號 13500 為 bios.rom(副檔名必須為 .rom)。
- 分離 OEM 模組:用 MMTool 載入
bios.rom,選擇模組 06 DMI,在 Extract 頁面以未壓縮格式匯出為 dmi.rom,保持 MMTool 開啟。
- 修改 OEM 資訊:用 UltraEdit 開啟
dmi.rom,尋找並修改 OEM 字串(亦可修改 BIOS 日期、版本),存檔。
- 替換模組:回到 MMTool,選中 06 DMI,切換至 Replace 頁,載入修改後的
dmi.rom,點擊 Replace,儲存 bios.rom。
- 更新資源:回到 ResScope,定位 BIOS 13500,匯入修改後的
bios.rom,儲存 Virtual PC.exe。
- 啟動 Virtual PC 測試,即可安裝 OEM 版 XP 免啟用。
二、修改 VMware Workstation 虛擬機 BIOS
所需工具
- ResScope
- Phoenix BIOS Editor 2.0.18E
操作步驟
- 備份並提取 BIOS:複製
C:\Program Files\VMware\VMware Workstation\bin\vmware-vmx.exe 備份。用 ResScope 開啟,選擇 BINRES 資源,提取模組 6006 存為 bios.rom。
- 編輯 BIOS:用 Phoenix BIOS Editor 開啟
bios.rom,修改 DMI 資訊中的「Motherboard Version」,選擇 File→Build BIOS 產生新檔。
- 寫回 vmware-vmx.exe:回到 ResScope,選中 6006 模組,匯入修改後的
bios.rom,點擊工具列儲存圖示更新資源。
完成後即可在 VMware 中安裝 OEM 版 Windows XP 免啟用。