Windows XP Windows 7 Windows 2003 Windows Vista Windows 綜合教學 Linux 系統教學
Windows 10 Windows 8 Windows 2008 Windows NT Windows Server 電腦軟體教學
您现在的位置: Windows教程網 >> Windows教程 >  >> Windows 綜合教學 >> 關於 Windows

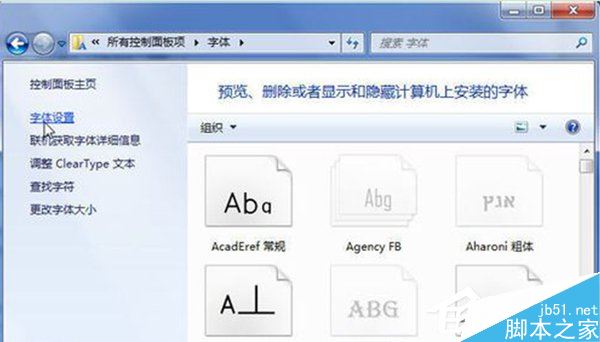
Win7 安裝字型失敗怎麼辦?修復 Fonts 資料夾 desktop.ini 檔案恢復字型安裝功能

編輯:關於 Windows

Windows 7 安裝字型 (右鍵 .ttf/.otf → 安裝) 失敗、或安裝後無法使用,常因 C:\Windows\Fonts 資料夾系統檔 desktop.ini 損壞/遺失導致。重建此檔案即可修復。

修復步驟

  1. 「電腦」→ 「工具」→ 「資料夾選項」→ 「檢視」→ 勾選「顯示隱藏檔案/資料夾」→ 取消勾選「隱藏受保護作業系統檔案」與「隱藏已知副檔名」→ 確定。
  2. 2. 開啟 C:\Windows\Fonts,若有 desktop.ini → 重新命名 (如 desktop.ini.bak)。 3. 新建文字文件,貼入以下內容,另存為 desktop.ini (編碼 ANSI/UTF-8 均可):
[.ShellClassInfo]
UICLSID={BD84B380-8CA2-1069-AB1D-08000948F534}
  1. 檔案右鍵 → 「內容」→ 勾選「唯讀」與「隱藏」→ 確定。
  2. 5. 重新開機,字型安裝功能恢復正常。

Fonts資料夾

其他可能原因

  • 字型檔案本身損壞/不相容 → 下載字型轉換工具嘗試轉檔。
  • 系統版本不相容 (如嘗試安裝 Win10 專用字型) → 確認字型支援 Win7。
  • 上述方法無效 → 考慮系統修復 (sfc /scannow) 或重裝系統。

Fonts 資料夾的 desktop.ini 定義其為系統特殊資料夾 (字型檢視/安裝介面),損壞會導致安裝入口失效。重建此檔為標準修復手法。

Copyright © Windows教程網 All Rights Reserved