在 Windows Server 2008 Hyper-V 建立虛擬機並安裝 64 位元 Windows Server 2008 Enterprise,需注意記憶體配置、虛擬硬碟大小、整合服務安裝等關鍵步驟。本文提供完整圖文流程。
建立虛擬機設定
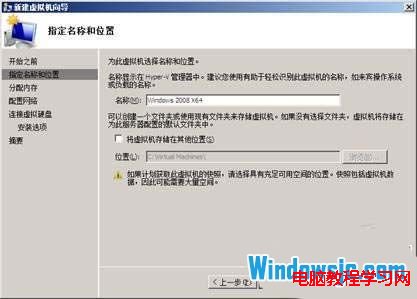
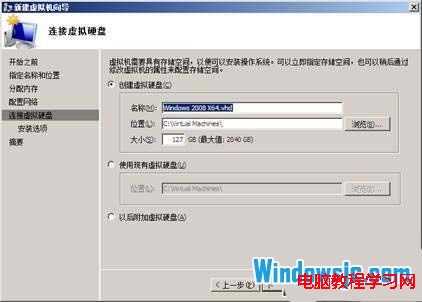
- 名稱:Windows 2008 X64
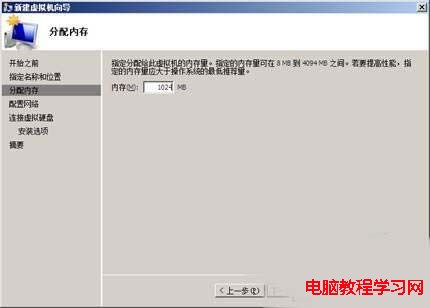
- 記憶體:1024 MB (建議 2GB 以上)
- 虛擬硬碟:127 GB (動態擴充)
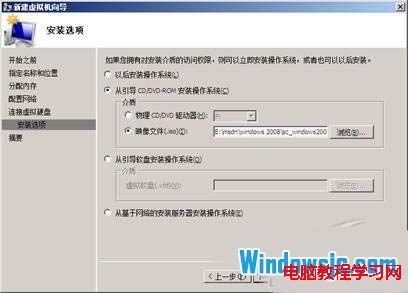
- 安裝媒體:掛載 Windows Server 2008 x64 ISO 映像檔
安裝作業系統
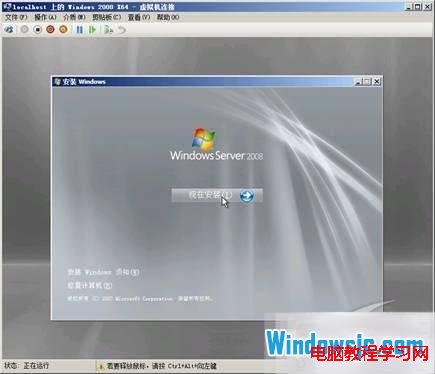
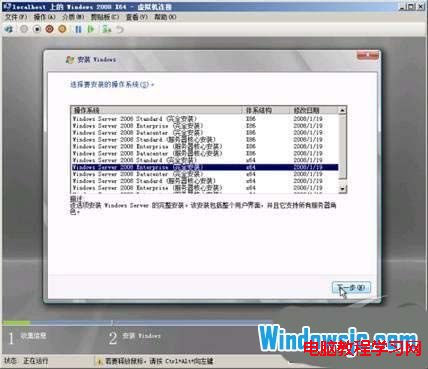
- 啟動虛擬機,選擇 64 位元企業版安裝。
- 磁碟分區:建議分兩個分區 (系統 C:、資料 D:)。
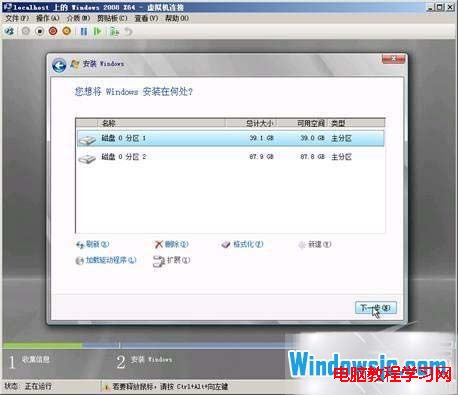
- 安裝完成後,首次登入需設定複雜密碼。
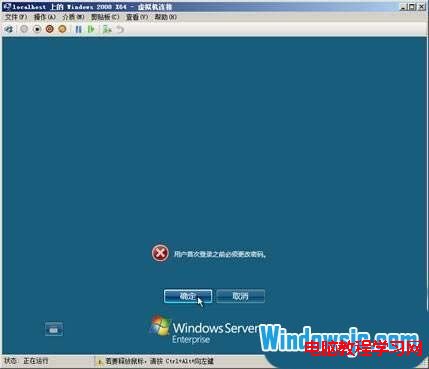
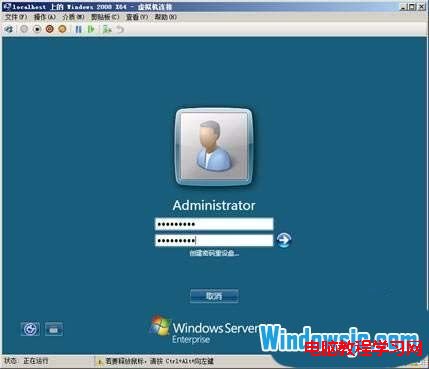
- 登入時需按 Ctrl + Alt + End (虛擬機傳遞 Ctrl+Alt+Del)。
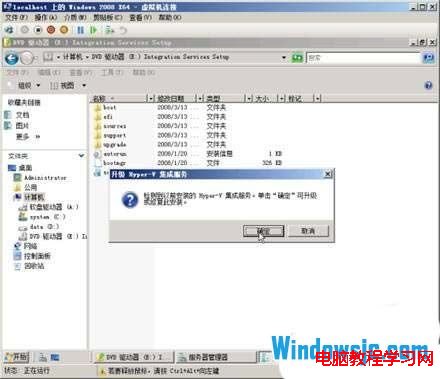
安裝整合服務 — 關鍵步驟
- 虛擬機選單 → 「動作」→ 「插入整合服務安裝光碟」。
- 虛擬機內執行安裝程式,完成後重新開機。
驗證與後續優化
- 裝置管理員確認「Hyper-V 虛擬裝置」無黃色驚嘆號。
- 啟用動態記憶體 (Dynamic Memory) 依負載自動調整。
- 設定虛擬網路介面卡連接外部虛擬交換器以連網。
- 安裝最新累積更新、啟用自動更新。
完成上述步驟,64 位元 Windows Server 2008 虛擬機即在 Hyper-V 中就緒,可投入生產環境或測試使用。