Windows XP Windows 7 Windows 2003 Windows Vista Windows 綜合教學 Linux 系統教學
Windows 10 Windows 8 Windows 2008 Windows NT Windows Server 電腦軟體教學

Win8 刪除 MSI 快取資料夾並壓縮 Installer 目錄,釋放磁碟空間

編輯:Win8 系統應用技巧

Windows Installer 目錄 (C:\Windows\Installer) 隨著軟體安裝/更新會累積大量快取檔案,佔用可觀磁碟空間。透過刪除 $PatchCache$ 資料夾並啟用 NTFS 壓縮,可安全釋放空間而不影響系統穩定。
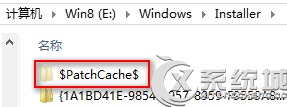
步驟一:刪除 $PatchCache$ 快取資料夾

  1. 開啟檔案總管,切換至「檢視」索引標籤,勾選「隱藏的項目」顯示系統隱藏資料夾。
  2. 進入 C:\Windows\Installer,找到 $PatchCache$ 資料夾並刪除。
  3. 若提示權限不足,需取得系統最高權限(TrustedInstaller)或使用第三方工具刪除。

警告:切勿刪除 Installer 目錄下其他 .msi 或資料夾,否則會導致對應軟體無法解除安裝或修復。

步驟二:啟用 NTFS 壓縮 Installer 目錄

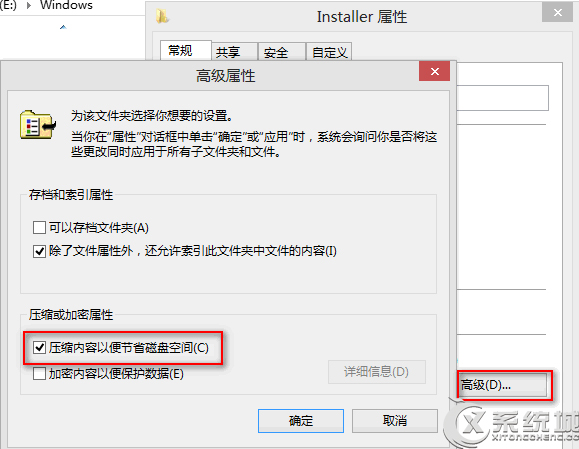
  1. 右鍵點選 C:\Windows\Installer 資料夾,選擇「內容」。
  2. 在「一般」索引標籤點選右下角「進階」。
  3. 勾選「壓縮內容以節省磁碟空間」,按確定套用至資料夾、子資料夾與檔案。

Installer 目錄內容多為安裝時的暫存檔,平時極少讀取,啟用壓縮對系統效能影響極小,卻能節省數 GB 空間。建議定期執行此維護動作。

Copyright © Windows教程網 All Rights Reserved