Windows XP Windows 7 Windows 2003 Windows Vista Windows 綜合教學 Linux 系統教學
Windows 10 Windows 8 Windows 2008 Windows NT Windows Server 電腦軟體教學

封裝製作 Windows 7 系統完整教程(五):使用 Ghost 或 ImageX 製作封裝映像與安裝光碟

編輯:Win7 系統基礎知識

Ghost vs ImageX

  • Ghost:最高壓縮下製作/還原較快,但映像檔較大、定制性弱(無法加入驅動程式、更新補丁)。
  • ImageX:製作/還原較慢,但映像較小、定制性強(可加入驅動、補丁)。

1. 使用 Ghost 製作

WinPE 啟動 → 執行 Ghost32.exe 將系統分區備份為 .GHO,建議加參數 -span -split=2000 -z9 啟用最高壓縮並分割 2000MB。還原即安裝。

2. 使用 ImageX 製作

  1. WinPE (建議 Win7 PE) 啟動,確保有 ImageX.exe (建議 6.1.7600.16385 版)。
  2. 切換至 ImageX 目錄,執行:
    imagex /compress maximum /check /scroll /capture X: Y:install.wim "Windows 7 Ultimate"
    參數說明:/compress maximum 最高壓縮、/check 驗證完整性、/scroll 滾動輸出、/capture X: 捕獲系統分區、Y:install.wim 輸出路徑、雙引號內為描述。
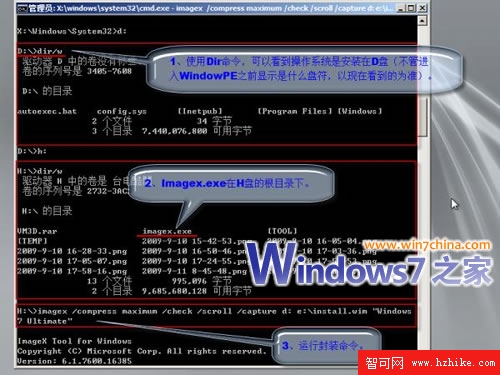
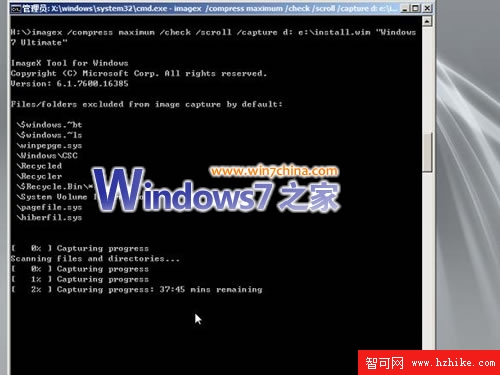
ImageX 捕獲命令
ImageX 成功提示

重開機會進入初始化(更新登錄、安裝驅動),可驗證封裝品質。

3. 製作封裝安裝光碟

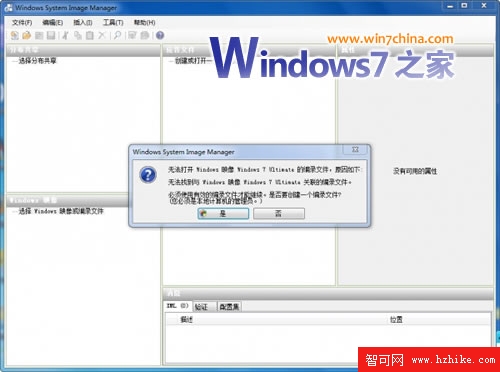
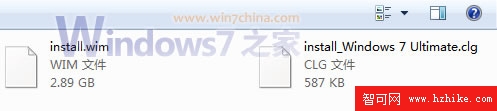
  1. 安裝 Windows 7 AIK → 執行「Windows 系統映像管理器」→「檔案」→「選擇 Windows 映像」→ 選 install.wim →「開啟」→ 建立編目檔 (.clg)。
  2. 建立編目檔
    產生 clg 檔
  3. 後續步驟同第六篇:用 UltraISO 替換原版映像內的 install.wim 與 clg。
Copyright © Windows教程網 All Rights Reserved