Windows 7 搜尋列無法輸入、搜尋結果為空、索引服務異常時,可透過註冊表新增 UseSearchAsst 字串值設為 NO 快速修復。本文提供圖文步驟與原理說明。
regedit → 確定,開啟登錄編輯器。HKEY_CURRENT_USER\Software\Microsoft\Windows\CurrentVersion\Explorer\CabinetStateUseSearchAsst。UseSearchAsst → 數值資料設為 NO → 確定。explorer.exe 或重新登入/重開機驗證搜尋功能恢復正常。
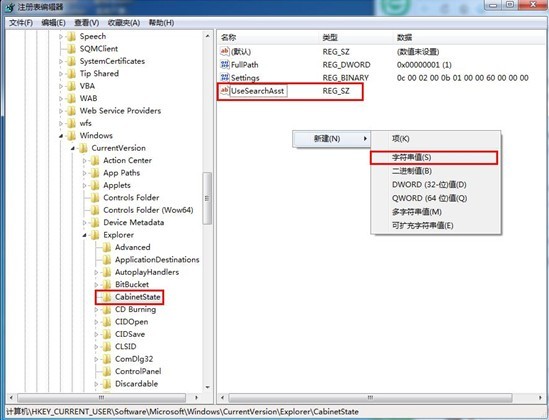
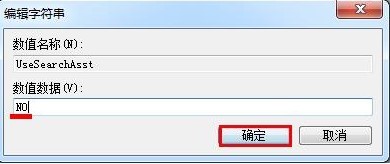
UseSearchAsst 控制是否使用舊版「搜尋小幫手」 (Search Assistant / Indexing Service) 介面。設為 NO 強制使用新版 Windows Search (Windows Search 4.0+) 整合式搜尋列,繞過舊元件可能的損壞/衝突。
services.msc → WSearch → 自動/執行中。sfc /scannow。Get-AppXPackage -AllUsers | Foreach {Add-AppxPackage -DisableDevelopmentMode -Register "$($_.InstallLocation)\AppXManifest.xml"}註冊表 UseSearchAsst=NO 是 Windows 7 搜尋功能失效的快速修復首選方案,操作簡單、風險低、見效快。