Ubuntu 系統修改語言環境 (Locale) 後頻繁出現 perl: warning: Setting locale failed、locale: Cannot set LC_CTYPE to default locale 等錯誤,導致中文顯示亂碼、man 頁面報錯。本文從根因分析到分級修復,提供徹底解決方案。
$ sudo dpkg-reconfigure locales
perl: warning: Setting locale failed.
perl: warning: Please check that your locale settings:
        LANGUAGE = "zh_CN:zh:en_US:en"
        LC_ALL = "zh_CN.UTF-8"
        LANG = "zh_CN.UTF-8"
    are supported and installed on your system.
perl: warning: Falling back to the standard locale ("C").
locale: Cannot set LC_CTYPE to default locale: No such file or directory
locale: Cannot set LC_MESSAGES to default locale: No such file or directory
locale: Cannot set LC_ALL to default locale: No such file or directory
/bin/bash: warning: setlocale: LC_ALL: cannot change locale (zh_CN.UTF-8)
zh_CN.UTF-8 對應的二進制 locale 文件 (/usr/lib/locale/zh_CN.utf8)。LC_ALL 強制覆蓋所有類別,若其值未生成則全線報錯。LANGUAGE 格式不規範zh_CN:zh,不應包含 en_US:en 導致回退邏輯混亂。
# 1. 編輯支持的 locale 列表
sudo sed -i '/^# zh_CN.UTF-8/s/^# //' /etc/locale.gen
# 或手動編輯取消註釋
# sudo vim /etc/locale.gen  # 找到 zh_CN.UTF-8 UTF-8 去掉前面 #

# 2. 重新生成
sudo locale-gen
# 輸出應包含:
# Generating locales...
#   zh_CN.UTF-8... done
# Generation complete.

# 3. 設置系統默認 locale
sudo update-locale LANG=zh_CN.UTF-8 LANGUAGE=zh_CN:zh
# 或
sudo localectl set-locale LANG=zh_CN.UTF-8 LANGUAGE=zh_CN:zh

# 4. 重新登錄或重啟驗證
locale
# 應無報錯,顯示 LANG=zh_CN.UTF-8 等
sudo dpkg-reconfigure locales
# 界面中空格選中 [ ] zh_CN.UTF-8 UTF-8
# Tab 切換到  回車
# 設置默認 locale 為 zh_CN.UTF-8
# 1. 臨時使用 C locale 執行修復
export LANG=C
export LC_ALL=C

# 2. 重新安裝 locales 包
sudo apt-get install --reinstall locales

# 3. 執行方案 A 步驟
sudo sed -i '/^# zh_CN.UTF-8/s/^# //' /etc/locale.gen
sudo locale-gen
sudo update-locale LANG=zh_CN.UTF-8 LANGUAGE=zh_CN:zh

# 4. 檢查用戶級覆蓋
grep -r "LANG\|LC_" ~/.profile ~/.bashrc ~/.pam_environment 2>/dev/null
# 發現則刪除或註釋相關行

# 5. 重啟系統
sudo reboot
$ locale
LANG=zh_CN.UTF-8
LANGUAGE=zh_CN:zh
LC_CTYPE="zh_CN.UTF-8"
LC_NUMERIC="zh_CN.UTF-8"
LC_TIME="zh_CN.UTF-8"
LC_COLLATE="zh_CN.UTF-8"
LC_MONETARY="zh_CN.UTF-8"
LC_MESSAGES="zh_CN.UTF-8"
LC_PAPER="zh_CN.UTF-8"
LC_NAME="zh_CN.UTF-8"
LC_ADDRESS="zh_CN.UTF-8"
LC_TELEPHONE="zh_CN.UTF-8"
LC_MEASUREMENT="zh_CN.UTF-8"
LC_IDENTIFICATION="zh_CN.UTF-8"
LC_ALL=

$ localectl list-locales
C.UTF-8
en_US.utf8
zh_CN.utf8

$ man ls   # 不再報 "can't set the locale"
# 單次命令運行
LANG=en_US.UTF-8 LC_ALL=en_US.UTF-8 my_command

# 桌面啟動器修改 (.desktop 文件)
Exec=env LANG=en_US.UTF-8 LC_ALL=en_US.UTF-8 /usr/bin/myapp

# 系統服務 (systemd)
# /etc/systemd/system/myapp.service
[Service]
Environment=LANG=zh_CN.UTF-8
Environment=LC_ALL=zh_CN.UTF-8
| 誤區操作 | 後果 | 正確做法 |
|---|---|---|
直接 export LC_ALL=zh_CN.UTF-8 不生成 locale | 所有程序報錯、中文亂碼 | 先 locale-gen 再設置環境變量 |
LANGUAGE=zh_CN:zh:en_US:en 混雜多語言 | 回退邏輯混亂、翻譯不全 | LANGUAGE=zh_CN:zh 單一優先級 |
修改 /etc/environment 添加 LC_* | PAM 讀取順序可能導致登錄失敗 | 使用 update-locale 或 localectl |
| 忽略用戶級配置 (~/.pam_environment) | 覆蓋系統設置、難以排查 | 統一在系統級配置,用戶級留空 |
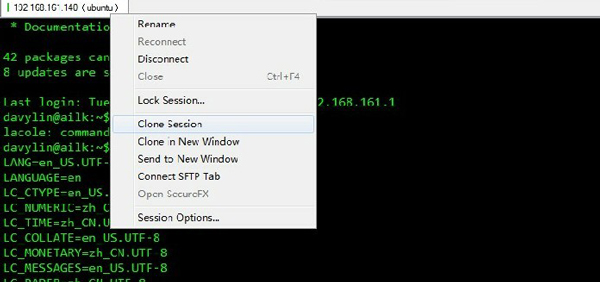
sudo locale-gen 確保目標 locale 存在於 /usr/lib/locale/。sudo update-locale LANG=zh_CN.UTF-8 LANGUAGE=zh_CN:zh。grep -r "LC_\|LANG" ~/.profile ~/.bashrc ~/.pam_environment。locale 無報錯、man 正常顯示中文。遵循「先生成、後設置、清殘留、驗證」四步法,Ubuntu Locale 雜亂無章的報錯將徹底成為歷史。