Windows XP Windows 7 Windows 2003 Windows Vista Windows 綜合教學 Linux 系統教學
Windows 10 Windows 8 Windows 2008 Windows NT Windows Server 電腦軟體教學

Windows XP 移除 Windows Search 完整教學:四種卸載法從易到難(含註冊表、系統檔案修復)

編輯:XP 系統應用技巧

Windows Search 4.0 (Windows Desktop Search) 安裝後取代 XP 原生搜尋,但佔用資源大、索引緩慢、許多用戶想移除卻發現「新增/移除程式」找不到、或卸載失敗。本文提供四種遞進式卸載法:控制台移除、系統解除安裝指令、註冊表解除安裝字串、手動補回卸載檔案,徹底移除 Windows Search 恢復 XP 原生搜尋體驗。
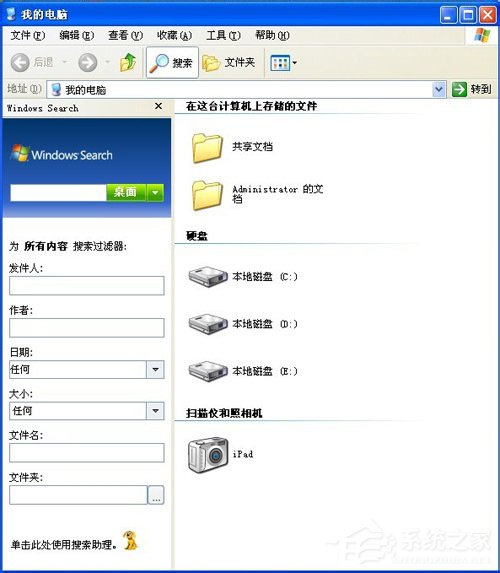
先確認版本

  • 開啟 Windows Search 視窗 → 右上角:
    「Windows Desktop Search」= 第 3 版 (WDS 3.0)
    「Windows Search」= 第 4 版 (WDS 4.0 / KB940157)

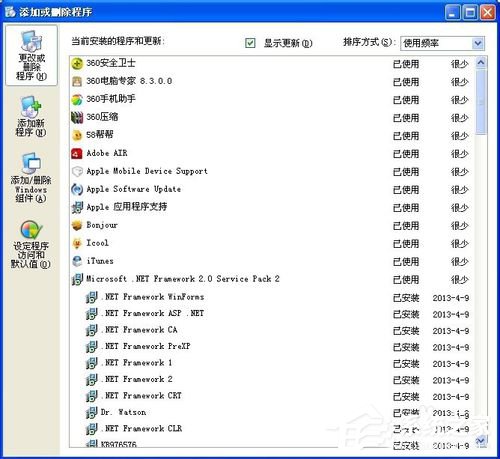
方法一:控制台「新增/移除程式」移除(最簡單)

  1. 控制台 → 新增/移除程式 → 找到「Windows Desktop Search」或「Windows Search」 → 移除。
  2. 若列表中找不到,進入方法二。

方法二:執行系統內建解除安裝指令

  1. Win+R → 輸入:
    %systemroot%\$NtUninstallKB940157$\spuninst\spuninst.exe
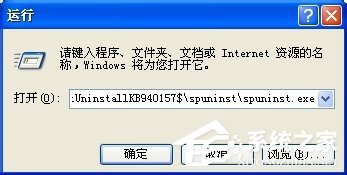
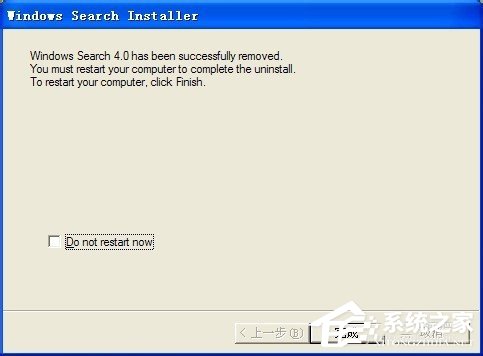
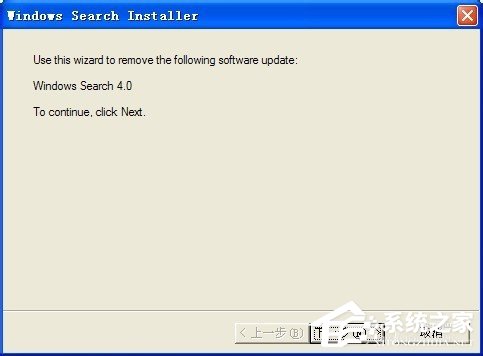
  2. 彈出解除安裝精靈 → 下一步 → 完成 → 重開機。

方法三:註冊表尋找解除安裝字串(指令路徑錯誤時)

  1. regedit → 搜尋「Windows Search」或瀏覽:
    HKEY_LOCAL_MACHINE\SOFTWARE\Microsoft\Windows\CurrentVersion\Uninstall
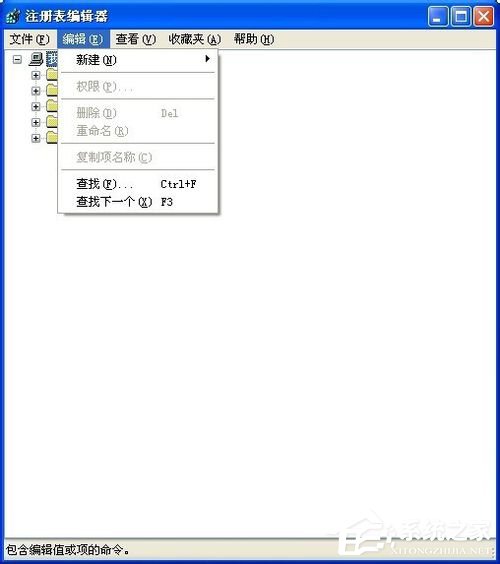
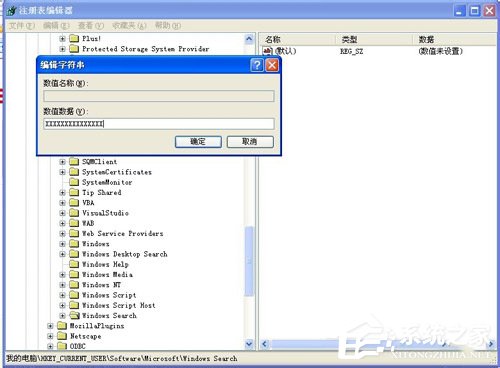
  2. 找到對應子機碼 → 右側 UninstallString 值 → 複製完整路徑(如 C:\Windows\$NtUninstallKB940157$\spuninst\spuninst.exe)。
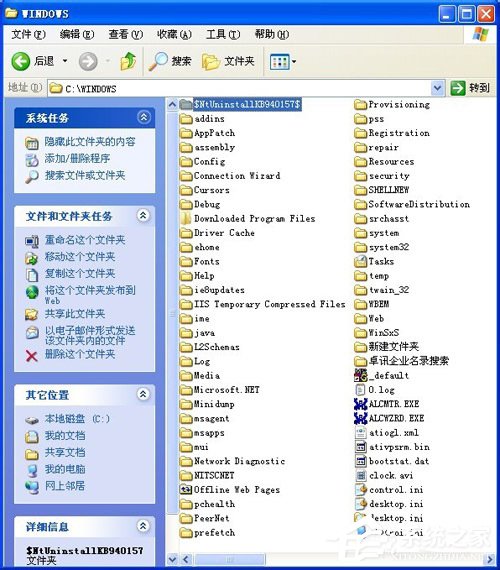
  3. Win+R 貼上執行 → 完成卸載 → 重開機。

方法四:手動補回卸載資料夾($NtUninstallKB940157$ 被刪除時)

  1. 下載對應版本卸載資料夾壓縮包(本文提供百度網盤連結)。
  2. 解壓至 C:\Windows\,確認出現 C:\Windows\$NtUninstallKB940157$\spuninst\spuninst.exe。
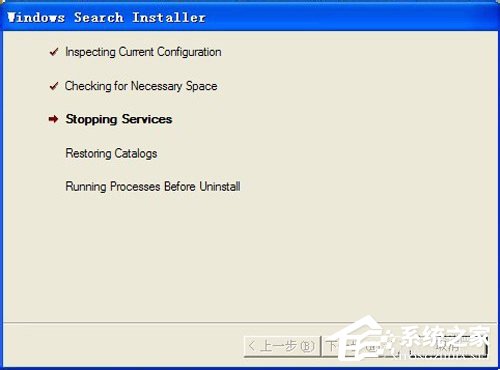
  3. 執行 %systemroot%\$NtUninstallKB940157$\spuninst\spuninst.exe → 英文介面連點「Next」 → 完成 → 重開機。
驗證移除成功

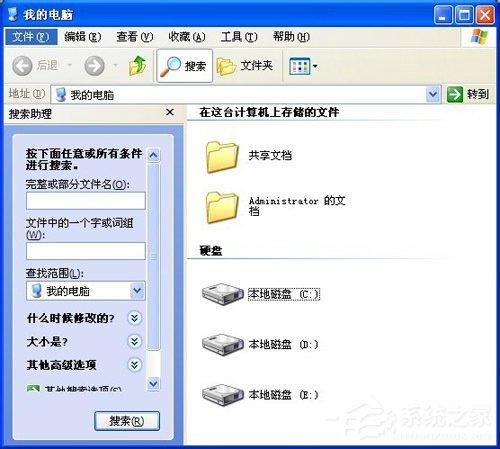
  1. 重開機後,「我的電腦」 → 搜尋 → 恢復 XP 原生「搜尋小幫手」介面(左側動畫狗/人、可選檔案類型/日期/大小)。
  2. 控制台 → 新增/移除程式 → 列表中不再出現 Windows Search。

常見問題

  • 卸載後搜尋仍異常:重建搜尋索引 → 控制台 → 索引選項 → 進階 → 重建。
  • 想保留索引功能但精簡資源:服務中將「Windows Search」設為「手動」,索引選項排除非必要資料夾。
  • 企業環境:請使用群組原則部署卸載腳本,避免用戶手動操作差異。
Copyright © Windows教程網 All Rights Reserved