Windows XP Windows 7 Windows 2003 Windows Vista Windows 綜合教學 Linux 系統教學
Windows 10 Windows 8 Windows 2008 Windows NT Windows Server 電腦軟體教學
您现在的位置: Windows教程網 >> Windows教程 >  >> Windows 綜合教學 >> 關於 Windows

Win10 升級後如何清除最近開啟檔案記錄?檔案總管清除、關閉記錄、第三方工具深度清理三步驟

編輯:關於 Windows

Windows 10 升級後,「快速存取」與「開始選單」的最近使用檔案/資料夾記錄繼承自舊系統,或因隱私需求想清除。提供三層次清理方案:**檔案總管內建清除/關閉**、**資料夾選項停用追蹤**、**第三方清理工具深度掃描**(含 Office 最近檔案、瀏覽器歷史、跳躍清單等系統級記錄)。
方法一:檔案總管內建「清除」按鈕(最快、僅限總管記錄)

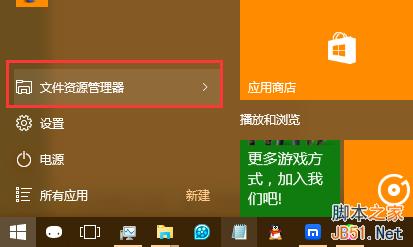
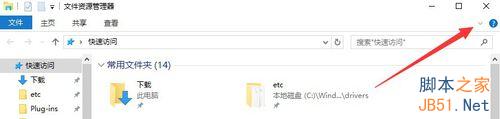
  1. 開啟檔案總管(Win+E)。
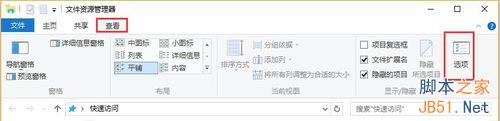
  2. 點擊標題列 「檢視」 索引標籤 > 「選項」(或右鍵快速存取空白處 > 選項)。
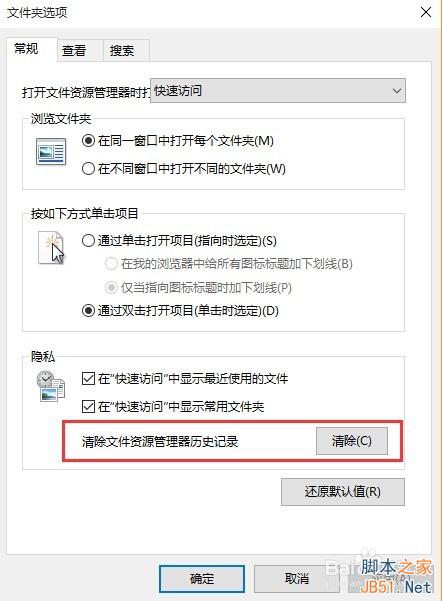
  3. 在「一般」索引標籤,「隱私權」 區塊點擊 「清除」 按鈕。
  4. 即刻清除「快速存取」與「開始選單」的最近使用檔案/資料夾記錄。

方法二:停用「顯示最近使用的檔案/資料夾」(根治不再記錄)

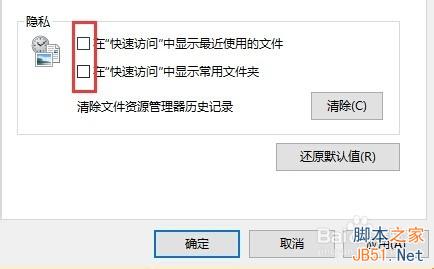
  1. 同樣在「資料夾選項」>「一般」>「隱私權」區塊。
  2. **取消勾選** 下列兩項:
    ☐ 在快速存取中顯示最近使用的檔案
    ☐ 在快速存取中顯示常用的資料夾
  3. 點擊「確定」。之後總管不再自動記錄/顯示最近使用項目,**僅顯示手動釘選的資料夾**。

方法三:第三方清理工具深度掃描(系統級/應用級記錄)

檔案總管清除**僅限總管自身記錄**,無法清除:

  • Office 應用程式 (Word/Excel/PPT) 的「最近開啟」清單
  • 瀏覽器 (Edge/Chrome/Firefox) 歷史、下載記錄、Cookie
  • 執行對話方塊 (`Win+R`) 歷史
  • 跳躍清單 (工作列右鍵/開始選單右鍵) 最近項目
  • Windows 搜尋/活動歷程 時間軸記錄

推薦工具(免費/免安裝版優先):

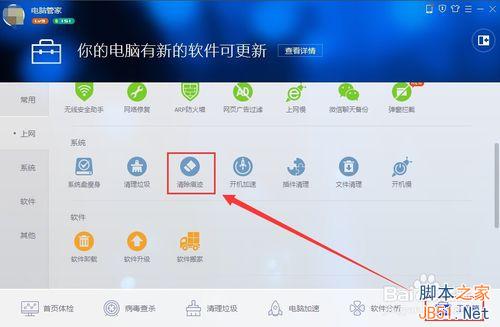
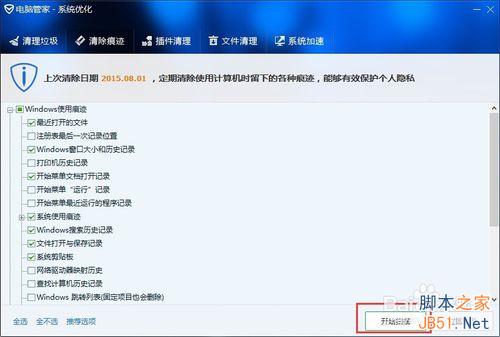
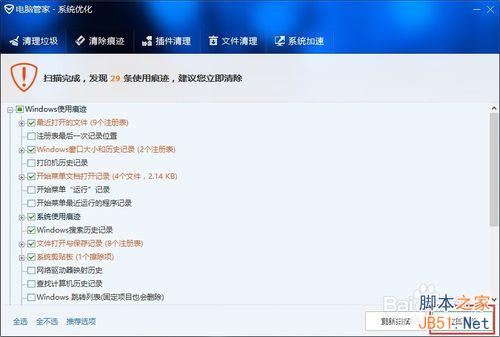
  • 騰訊電腦管家 > 工具箱 > 清除痕跡 > 掃描 > 立即清除
  • 360 安全衛士 > 功能大全 > 痕跡清理
  • CCleaner (Free/Portable) > 自訂清理 > 勾選「Windows」>「檔案總管」、「系統」>「最近文檔」、「執行歷史」等 > 分析 > 清理
  • BleachBit (開源/跨平台) > 深度清理系統快取/記錄/日誌

進階:群組原則/登錄表強制停用(企業/多使用者環境)

# 群組原則
User Configuration > Administrative Templates > Windows Components > File Explorer > Turn off display of recent search entries in File Explorer = Enabled
User Configuration > Administrative Templates > Start Menu and Taskbar > Do not keep history of recently opened documents = Enabled

# 登錄表 (當前使用者)
reg add "HKCU\Software\Microsoft\Windows\CurrentVersion\Explorer\Advanced" /v Start_TrackDocs /t REG_DWORD /d 0 /f
reg add "HKCU\Software\Microsoft\Windows\CurrentVersion\Explorer\Advanced" /v Start_TrackProgs /t REG_DWORD /d 0 /f

Win7 經典「開始選單屬性 > 隱私權 > 清除」對應功能去哪了?

Win10 將此功能**分散至**:檔案總管選項(總管記錄)、設定 > 隱私權 > 活動歷程(時間軸/跨裝置同步)、登錄表/群組原則(跳躍清單/執行歷史),**無單一介面集中管理**,需分別設定或用第三方工具一次清理。

三層次清理方案任選,從快速清除到深度隱私保護,Win10 最近開啟記錄全掌控。

Copyright © Windows教程網 All Rights Reserved