Windows XP Windows 7 Windows 2003 Windows Vista Windows 綜合教學 Linux 系統教學
Windows 10 Windows 8 Windows 2008 Windows NT Windows Server 電腦軟體教學

Adobe CS6 系列在 Windows 7/8 安裝失敗解決:刪除 C:\Program Files\Common Files\Adobe\caps\.db 資料庫檔案

編輯:Win8 系統應用技巧

Adobe CS6 系列 (Photoshop、Illustrator、Dreamweaver、Flash、After Effects 等) 在 Windows 7/8 安裝失敗,官方清理工具無效時,刪除 caps 資料夾內的 .db 資料庫檔案通常可解決。

問題現象

  • 安裝過程中途報錯「安裝失敗」,無具體錯誤代碼。
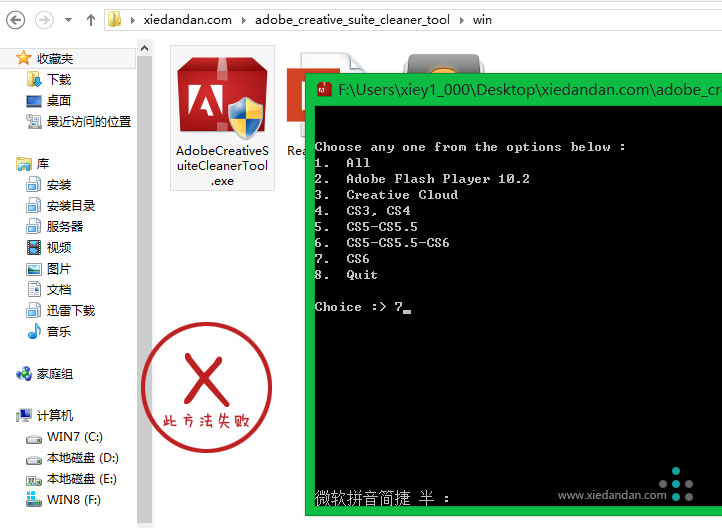
  • 官方 Adobe Creative Cloud Cleaner Tool 執行後重啟仍失效。
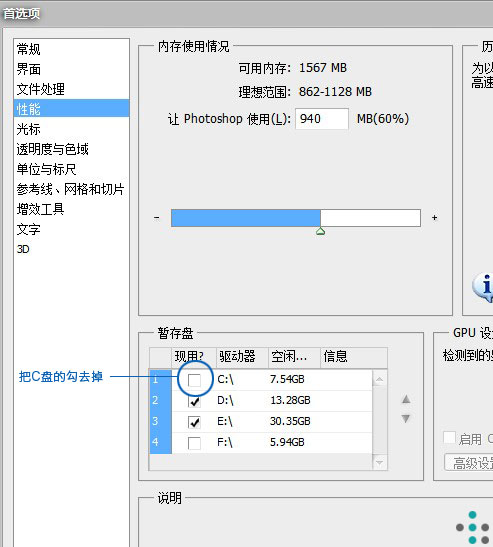
  • 雙系統環境 (Win7 + Win8) 因權限導致 Photoshop 二次啟動失敗,需手動更改快取路徑。

核心解決方法

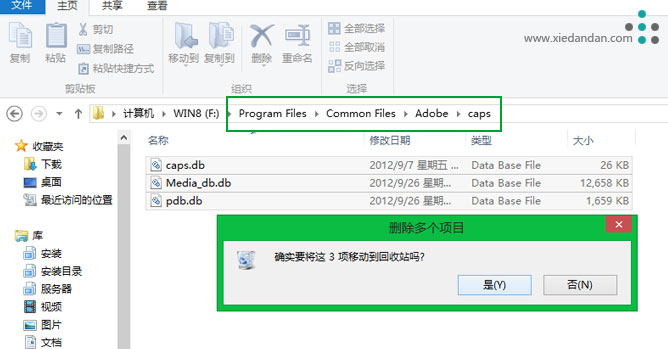
  1. 開啟檔案總管,進入系統盤:
    C:\Program Files\Common Files\Adobe\caps\ (64-bit 系統可能在 Program Files (x86))
  2. 刪除資料夾內所有 .db 檔案 (通常為 3 個),或為保險起見移動至其他位置備份。
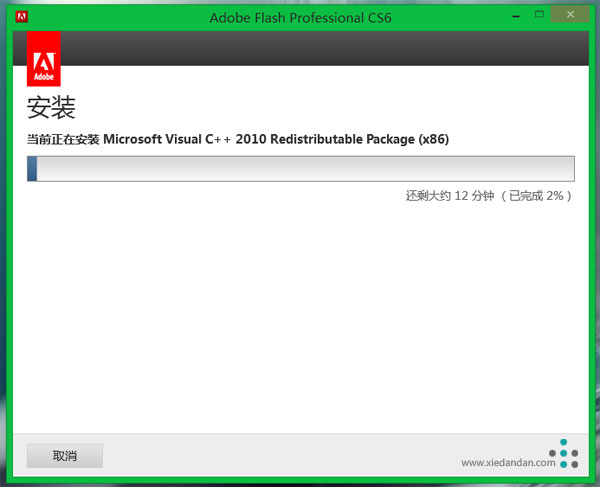
  3. 重新執行 CS6 安裝程式,將自動重建資料庫並安裝必要的 VC++ 執行階段元件。

Photoshop 快取路徑設定

Flash CS6 安裝失敗

caps 資料夾 .db 檔案

安裝成功畫面

適用範圍

Adobe CS6 全系列通用:Photoshop CS6、Illustrator CS6、InDesign CS6、Dreamweaver CS6、Flash Professional CS6、Fireworks CS6、After Effects CS6、Premiere Pro CS6、Audition CS6 等。

雙系統額外補充

  • Win8 安裝在非 C 槽時,Photoshop 預設快取在 C 槽導致二次啟動失敗 (權限不足)。
  • 解決:首次啟動 PS 後立即進入「編輯」→「偏好設定」→「效能」→ 取消 C 槽勾選,改指定其他盤 (如 D/E 槽) 為快取磁碟。

刪三個 .db 檔,Adobe CS6 安裝失敗迎刃而解!

Copyright © Windows教程網 All Rights Reserved