Windows XP Windows 7 Windows 2003 Windows Vista Windows 綜合教學 Linux 系統教學
Windows 10 Windows 8 Windows 2008 Windows NT Windows Server 電腦軟體教學

Windows 7 硬碟重新命名後無法正常顯示解決方案:刪除根目錄隱藏檔

編輯:Win7 系統基礎知識

許多使用者發現,在 Windows XP 時代重新命名過的硬碟磁碟機標籤,升級到 Windows 7 後無法正常顯示自訂名稱,仍顯示預設「本機磁碟」。經排查,原因在於磁碟根目錄殘留兩個隱藏系統檔:auto.exe 與 autorun.inf,這些檔案通常由病毒免疫工具或惡意程式建立,且屬性為「系統/隱藏/唯讀」,一般刪除方式 (含安全模式) 均無法移除。

解決工具:Unlocker

Unlocker 是一款免費小工具,能釋放被系統/進程鎖定的檔案鎖定並強制刪除。

下載與驗證

  • 官網:https://ccollomb.free.fr/unlocker/
  • 直接下載 1.8.8 版:https://ccollomb.free.fr/unlocker/unlocker1.8.8.exe
  • MD5: e375121e3e53726a2c6cdb52f4d80ae3
  • SHA1: 06c15ca58ddda1072f5ab4c820dac979faa72a34

操作步驟

  1. 安裝 Unlocker (安裝時取消勾選「安裝 Delta Toolbar」等推廣元件)。
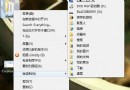
  2. 開啟「電腦」,右鍵點選有問題的磁碟機代號 (如 D:),選擇 Unlocker。
  3. 在 Unlocker 視窗中,若列出 auto.exe、autorun.inf,選取它們,動作選 刪除,點擊 確定。
  4. 若提示需重新開機才能刪除,選擇 重新開機後刪除。
  5. 完成後,右鍵磁碟機 → 重新命名,自訂名稱即可正常顯示。

替代方案

  • 使用 LockHunter、FileASSASSIN 等同類工具
  • 啟動 Linux Live USB 掛載 NTFS 分區手動刪除
  • 命令列 (需管理員權限):attrib -s -h -r X:\auto.exe X:\autorun.inf && del X:\auto.exe X:\autorun.inf (X 為磁碟代號)

清除這兩個殘留檔後,Windows 7 即能正確讀取磁碟機標籤 (儲存在 autorun.inf 的 label 欄位),自訂命名功能恢復正常。

Copyright © Windows教程網 All Rights Reserved