無光碟機、不想燒錄 ISO,利用硬碟空間即可全新安裝 Win7 旗艦版。本文整理四種常見情境的完整步驟,含關鍵的 bootsect.exe 寫入啟動區、取得系統檔案權限、BCD 修復等細節。
共同準備
- 下載 Win7 旗艦版 ISO,用 WinRAR 解壓至非 C 槽(如 D:\Win7)。
- 確保 D:\Win7\sources\boot.wim 存在(安裝啟動映像)。
方法一:Win7 環境下(利用修復環境)
- 開機按 F8 → 「修復電腦」→ 「命令提示字元」。
- 輸入
D:\Win7\sources\setup.exe 啟動安裝。
- 選「自訂」→ 格式化 C 槽 → 安裝純淨系統。
方法二:有 Vista 安裝光碟
- BIOS 設光碟優先開機,進 Vista 安裝介面。
- 選「修復電腦」→ 「命令提示字元」。
- 輸入
D:\Win7\sources\setup.exe 安裝(即使 C 槽原本無系統也可)。
方法三:XP 環境下安裝
- 將 D:\Win7\bootmgr、D:\Win7\boot 資料夾(含 boot.sdi、BCD)複製到 C:\。
- 在 C:\ 建立 sources 資料夾,複製 D:\Win7\sources\boot.wim 到 C:\sources\。
- 複製 D:\Win7\boot\bootsect.exe 到 C:\。
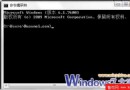
- CMD 執行
c:\bootsect.exe /nt60 c: 寫入 Win7 啟動區。
- 重開機 → 自動進入安裝介面 → 左下角「修復電腦」→ 「命令提示字元」→ 輸入
D:\Win7\sources\setup.exe 正式安裝。
方法四:Vista/Win7 環境下(需取得系統檔權限)
- 複製 D:\Win7 的 Boot、EFI、sources 資料夾及 bootmgr 到 C:\。
- 複製 D:\Win7\boot\bootsect.exe 到 C:\。
- 取得 C:\boot、C:\bootmgr 完整控制權限(安全性→進階→擁有者→Administrator→勾選取代子容器→權限給 Administrators 完全控制)。
- 管理員 CMD 執行
c:\bootsect.exe /nt60 c:。
- 重開機 → 「修復電腦」→ 「命令提示字元」→
D:\Win7\sources\setup.exe 安裝。
補充:32 位元系統硬碟安裝 64 位元 Win7
同方法四,但解壓 64 位元 ISO 到 D:\Win7_64,複製其 Boot、EFI、sources、bootmgr 到 C:\,執行 bootsect.exe /nt60 c:,重開機進修復環境,CMD 切到 D: 執行 Win7_64\sources\setup.exe。
關鍵工具:bootsect.exe
將 NT6.x(Vista/Win7/2008)啟動程式碼寫入分區啟動區與 MBR,是硬碟安裝核心關鍵。隨 Win7 ISO 於 boot\bootsect.exe。
掌握這四法,無論原系統為何,皆可無光碟全新安裝 Win7 旗艦版。