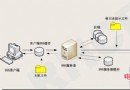
Nagios 是業界標杆級開源監控系統,支持主機/服務/網絡設備全方位監控並提供靈活告警機制。本文基於 CentOS 7 環境,記錄 Nagios Core 4.x 及 Plugins 的源碼編譯安裝全過程,包含用戶/組規劃、Apache 整合、Web 認證配置等生產級細節。
/usr/local/nagioshttps://<Server_IP>/nagios/nagiosadmin(自定義密碼)# 核心構建工具與庫 yum install -y gcc glibc glibc-common make cmake automake autoconf # Web 服務與 PHP yum install -y httpd httpd-devel php php-cli php-gd # 圖形庫(狀態圖、插件依賴) yum install -y gd gd-devel libpng-devel libjpeg-devel # SSL 與網絡工具 yum install -y openssl-devel net-snmp net-snmp-devel net-snmp-utils # 郵件告警依賴 yum install -y postfix mailx
groupadd nagcmd                    # 外部命令組
useradd -G nagcmd nagios           # Nagios 運行用戶
usermod -aG nagcmd apache          # Apache 加入命令組(執行 CGIs)
passwd nagios                      # 設置密碼
mkdir -p ~/nagios-src && cd ~/nagios-src

# Nagios Core(官網最新穩定版)
wget https://assets.nagios.com/downloads/nagioscore/releases/nagios-4.4.14.tar.gz

# Nagios Plugins(監控插件集)
wget https://github.com/nagios-plugins/nagios-plugins/releases/download/release-2.4.6/nagios-plugins-2.4.6.tar.gz

tar -zxvf nagios-4.4.14.tar.gz
tar -zxvf nagios-plugins-2.4.6.tar.gz
cd nagios-4.4.14

# 配置:指定前綴、用戶/組、命令組、啟用事件代理
./configure \
  --prefix=/usr/local/nagios \
  --with-nagios-user=nagios \
  --with-nagios-group=nagios \
  --with-command-group=nagcmd \
  --enable-event-broker

make all
make install               # 核心程序、CGIs、HTML
make install-init          # Systemd 服務文件
make install-config        # 樣例配置文件
make install-commandmode   # 外部命令目錄權限
make install-webconf       # Apache 配置片段
cd ../nagios-plugins-2.4.6
./configure --with-nagios-user=nagios --with-nagios-group=nagios --prefix=/usr/local/nagios
make
make install
/usr/local/nagios/etc/objects/contacts.cfg)define contact{
contact_name nagiosadmin
use generic-contact
alias Nagios Admin
email your@email.com # 改為真實郵箱
}
htpasswd -c /usr/local/nagios/etc/htpasswd.users nagiosadmin
# 提示輸入兩次密碼
systemctl enable httpd nagios
systemctl start httpd nagios
firewall-cmd --permanent --add-service=http
firewall-cmd --permanent --add-service=https
firewall-cmd --reload
https://<IP>/nagios/,輸入 nagiosadmin 及密碼。localhost 及默認監控項,狀態為 OK。| 現象 | 原因 | 解決 |
|---|---|---|
| Web 界面 403 Forbidden | Apache 權限/SELinux | setsebool -P httpd_can_network_connect 1;檢查 /etc/httpd/conf.d/nagios.conf Require all granted |
| CGI 圖表不顯示 | GD 庫缺失或路徑錯誤 | 重裝 gd gd-devel 並重新 make install Nagios Core |
| 外部命令不生效 | 命令管道權限/組 | 確認 nagios.cmd 屬組 nagcmd,Apache 在該組 |
| 郵件告警不發送 | Postfix 未配置/郵件進垃圾箱 | 配置 relayhost、SPF/DKIM,測試 echo test | mail -s test admin@domain.com |
nrpe + nagios-plugins 於被監控 Linux 主機,實現遠程指標採集。源碼編譯雖步驟較多,但可精確控制版本、編譯參數與安裝路徑,適合對穩定性、合規性有要求的生產環境。完成基礎部署後,建議優先接入 NRPE 實現分佈式監控,再逐步引入可視化與自動化運維體系。