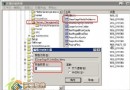
C:\Windows\Fonts (XP/7/10/11 通用)。資料夾內為所有已安裝字體檔,副檔名常見 .ttf (TrueType)、.fon (點陣)、.ttc (TrueType 集合)。
.ttf/.ttc/.fon 檔。C:\Windows\Fonts 資料夾。.ttf、.fon、.ttc 格式,其他格式 (如 .otf) 需轉換或 Windows 10+ 原生支援。Windows XP 輸入法調教:智能 ABC 光標跟隨與經典工具列恢復
Windows XP 一鍵擁有四個虛擬桌面:msvdm.dll 註冊與切換技巧
Windows XP 管理員密碼遺失?5 大秘訣教你破解與重置
掌控 XP 與 Vista:禁用通知、桌面精靈、列印資料夾、破解加速迷思、拷貝被佔用檔案
用 Ghost 完美克隆 Windows XP + SP2:打造免驅動安裝映像檔
Windows XP SP2 IE 增強安全功能導致檔案以純文字開啟、安全中心紅色圖示的成因與對策
Windows XP 開機故障全景圖譜:NTLDR 遺失、I/O 錯誤、Boot.ini 損壞、HAL.DLL 找不到、雙系統引導修復