原版 XP 安裝光碟含大量鮮少用到的檔案,佔用空間。本文以 XP Pro 為例,示範如何製作精簡版安裝映像(ISO),最終從 560MB 縮減至 448MB,騰出 112MB 放入常用工具。
光碟開機執行 X:\Setup.exe /noreboot(X 為光碟代號),選「全新安裝」→「進階選項」→ 勾選「從安裝 CD 複製所有安裝檔案」。安裝複製完成自動回桌面,系統根目錄會出現 $WIN_NT$.~BT 和 $WIN_NT$.~LS 兩資料夾。
$WIN_NT$.~LS → 改名 Install$WIN_NT$.~BT → 改名 BOOT(大寫)並移入 InstallInstall\SIZE.SIF、BOOT\Migrate.inf、BOOT\Winnt.sif(可換成自訂無人值守安裝檔)I386\bootfix.bin 複製至 BOOTSPNOTES、WIN51、WIN51IP、WIN51IP.SP1 至 InstallBBIE X: 取得開機映像 Image1.bin(存於 BBIE 目錄)。Image1.bin,搜尋取代 i386 → BOOT(1 次),存檔。BOOT\Setupldr.bin,搜尋取代 i386 → BOOT(4 次),存檔。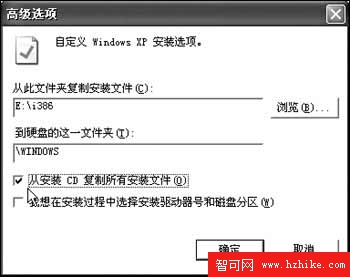
圖 1:安裝選項設定
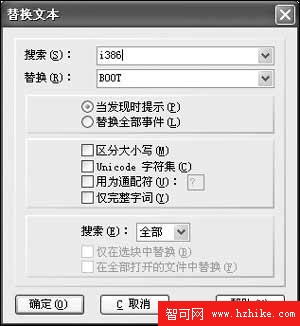
圖 2:修改開機映像
命令提示字元進入 CDImage 目錄,執行:
CDimage -l MyXP -b c:\BbIE\image1.bin -h -n -m -o c:\install c:\Myxp.iso
參數說明:-l 卷標、-b 開機映像路徑、-o 來源資料夾、輸出 ISO 路徑。
用 Nero 或 Alcohol 120% 燒錄 Myxp.iso,完成!