本文說明如何將 DHCP 資料庫從 Windows NT 4.0、Windows 2000 或 Windows Server 2003 遷移至 Windows Server 2003,涵蓋匯出、壓縮、匯入、授權全流程。
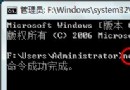
net stop "microsoft dhcp server"
cd %systemroot%\system32\dhcp
jetpack dhcp.mdb temp.mdb
需從 Windows 2000 Resource Kit Supplement 1 或微軟網站取得 Dhcpexim.exe。
dhcpdatabase.txt)。「服務」中將 Microsoft DHCP Server 設為「停用」並停止服務。
替代方案:僅需配置(非資料庫),可在 Windows 2000 上執行:
netsh dhcp server export C:\dhcp.txt all
使用 netsh 指令簡化流程:
netsh dhcp server export C:\dhcp.txt all
# 將檔案複製至新伺服器
netsh dhcp server import C:\dhcp.txt all
netsh dhcp server import c:\dhcpdatabase.txt all完成遷移與授權,新伺服器即可接管 DHCP 服務。
Windows 2000 DLL 檔案遺失或報錯?系統檔案檢查器 (SFC) 完整指令手冊
Windows 五大常見密碼機制與破解實測:BIOS、安裝序號、使用者、電源管理、螢幕保護
Windows 2000 修補程式快速部署指南:命令列參數與批次檔自動化安裝全攻略
Windows Server 2003 運行 Sysprep 時套用自訂使用者設定
Windows Server 2008 Core 修改桌面解析度完整指令教學