Windows XP Windows 7 Windows 2003 Windows Vista Windows 綜合教學 Linux 系統教學
Windows 10 Windows 8 Windows 2008 Windows NT Windows Server 電腦軟體教學
您现在的位置: Windows教程網 >> Windows教程 >  >> Windows 綜合教學 >> 關於 Windows

Win10 系統開啟或關閉自動維護功能的方法

編輯:關於 Windows

Win10 自動維護功能可在閒置時按計劃進行軟件更新、系統掃描等,默認開啟且無關閉選項,可通過註冊表關閉。
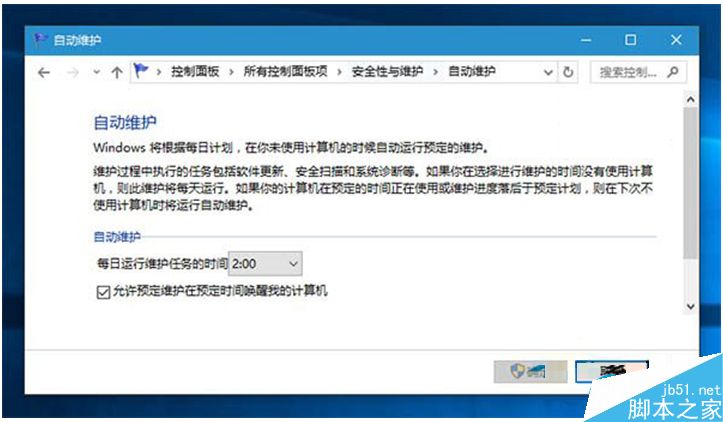
操作方法:

  1. 按 Win+R 輸入 regedit 回車打開註冊表編輯器。
  2. 展開註冊表位置:
    HKEY_LOCAL_MACHINE\SOFTWARE\Microsoft\Windows NT\CurrentVersion\Schedule\Maintenance
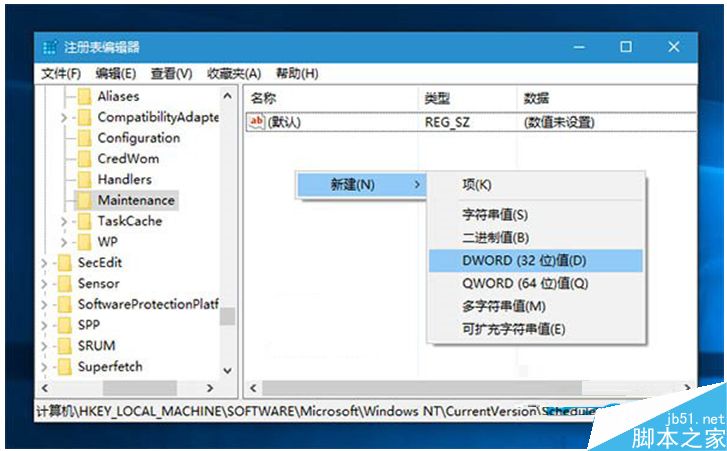
  3. 右側新建 DWORD(32位)值,命名為 MaintenanceDisabled。

  1. 雙擊 MaintenanceDisabled,將值修改為 1,保存即可關閉自動維護。
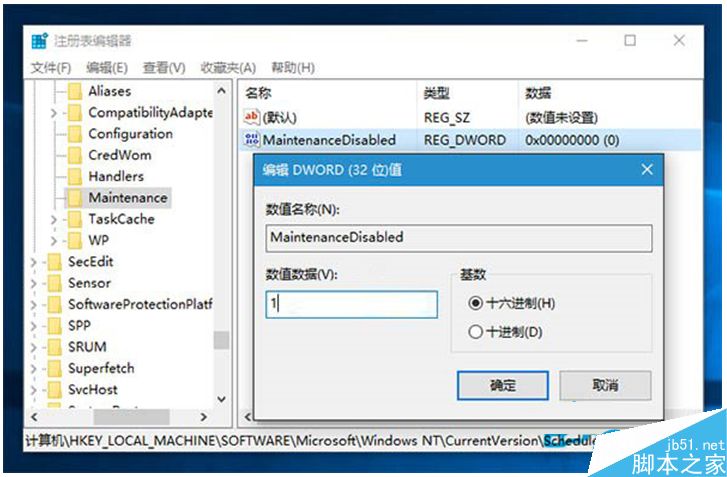
  1. 重啟系統。

若要重新開啟自動維護,將 MaintenanceDisabled 修改為 0 或刪除該鍵值即可。

自動維護會佔用資源、導致卡屏等問題,用戶使用時需權衡。

以上就是 Win10 開啟/關閉自動維護功能的方法,希望幫助到大家!

Copyright © Windows教程網 All Rights Reserved