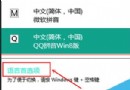
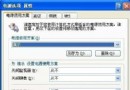
Windows 10 為了安全性,預設僅允許載入經 Microsoft WHQL 認證簽章的驅動程式。開發、測試或安裝舊版/非認證驅動時,需暫時停用強制簽名。本文說明透過「進階啟動選項」一次性停用的標準流程(重開機後失效,屬臨時停用)。
bcdedit /set nointegritychecks on 指令修改開機設定(需管理員權限)。如何永久停用 Win10 驅動程式強制簽名?一條指令幫你搞定
掌握此流程,即可在需要安裝非簽章驅動時靈活應對。
Win7 命令提示字元 (cmd) 如何複製貼上?啟用「快速編輯模式」滑鼠選取即複製、Ctrl+V 貼上
微軟 2 月補丁星期二:釋出 12 款安全更新,重點修補遠端程式碼執行漏洞
Win10 開機啟動項優化完整指南:工作管理器、Shell 資料夾、登錄三管道管理
Win10 如何進入安全模式?兩大法:系統配置(msconfig)與 WinRE 恢復環境圖文詳解
Windows 7 任務管理器設定進程處理器親和性:指定 CPU 核心執行特定程式
Build 2015 大會:微軟揭曉 Windows 10 即將到來的新特性與十億裝置宏大目標