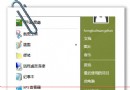
Windows 7 專業版/企業版/旗艦版內建 Windows Virtual PC (非 Virtual PC 2007),可建立虛擬機安裝 XP 解決相容性問題,甚至安裝另一個 Win7 測試環境。
善用內建虛擬機,免裝第三方軟體即可跑舊系統或測試環境。
Win 10 通用應用「奇妙清單」Wunderlist 公測版釋出,支援跨平台同步待辦事項
Win10 如何安裝 Office 2016 ISO 檔案?資源管理員掛載安裝完整教學
Win10 如何更換鎖定畫面壁紙?個人化設定鎖定畫面背景圖片自訂
Windows 10 第二波累積更新 KB3081436 修復內容詳解:6 項安全修補含 Edge/IE/Flash/Silverlight
Win10 一週年更新 14332 SDK 釋出:僅支援 14332+、10240/10586 無法使用、桌面應用轉換預覽版不相容
WinXP 在裝置管理員更新掃描儀驅動程式 解決 WIA/Twain 掃描失敗
Win10 內建螢幕錄影神器:Win+G 呼叫 Game Bar 錄製遊戲畫面教學
Win10 Windows Defender 無法開啟?檢查服務路徑或管理員命令提示字元執行 sc start WinDefend Enable