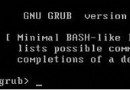
Ubuntu 透過自動更新頻繁安裝新核心,舊核心不會自動移除,導致 /boot 分區空間不足、GRUB 選單冗長。本文說明如何列出已安裝核心、識別當前使用核心、安全移除舊核心並更新開機載入器。
dpkg --get-selections | grep linux-image輸出範例:
linux-image-5.15.0-46-generic    install
linux-image-5.15.0-48-generic    install
linux-image-5.15.0-50-generic    install
linux-image-generic installlinux-image-x.x.x-xx-generic:具體核心版本linux-image-generic:元套件,永遠指向最新核心uname -r
# 輸出範例:5.15.0-50-generic絕對不要移除此版本對應的套件!
# 僅移除核心映像
sudo apt-get remove linux-image-5.15.0-46-generic

# 連同 headers、modules 一併移除 (更乾淨)
sudo apt-get remove linux-image-5.15.0-46-generic linux-headers-5.15.0-46-generic linux-modules-5.15.0-46-generic linux-modules-extra-5.15.0-46-generic# 列出所有非當前核心的 image 套件
dpkg -l 'linux-image-*' | awk '/^ii/ && $2 !~ "'"$(uname -r)"'" {print $2}' | xargs sudo apt-get -y purge執行前請三次確認列表不含當前核心!
apt autoremove (Ubuntu 18.04+ 自動保留當前及前一版)sudo apt autoremove --purge此指令會自動移除不再需要的舊核心、孤立套件,保留當前運行核心及其前一版作為回滾備用。
# 檢查 /boot 空間
df -h /boot

# 確認 GRUB 選單已更新
grep menuentry /boot/grub/grub.cfg

# 重開機測試
reboot| 問題 | 說明 |
|---|---|
/boot 100% 滿導致 apt 無法安裝新核心 | 先手動刪除 /boot 下最舊的 vmlinuz/initrd 檔案騰出空間,再執行 apt-get -f install |
| 誤刪當前核心 | 系統下次重開機將無法啟動,需用 Live USB 掛載根分區重裝核心套件 |
| 保留幾個舊核心較安全? | 建議保留當前 + 前一版 (共 2 個),兼顧空間與回滾能力 |
| HWE (Hardware Enablement) 核心 | LTS 版本可能有 linux-image-5.13.0-xx-generic (HWE) 與 linux-image-5.4.0-xx-generic (GA) 並存,分別管理 |
#!/bin/bash
# 清理舊核心,保留當前與前一版
CURRENT=$(uname -r | sed 's/-generic//')
PREVIOUS=$(dpkg -l 'linux-image-*' | awk '/^ii/ {print $2}' | grep -v "$CURRENT" | tail -1 | sed 's/linux-image-//' | sed 's/-generic//')
apt-get -y purge $(dpkg -l 'linux-image-*' | awk '/^ii/ && $2 !~ "linux-image-('"$CURRENT"'|'"$PREVIOUS"')" {print $2}')
apt-get -y autoremove
update-grub定期清理舊核心是 Ubuntu 維護的基本功。掌握 dpkg --get-selections、uname -r、apt remove/purge、apt autoremove 組合拳,即可輕鬆控制 /boot 空間與 GRUB 選單長度。