早期Red Hat Enterprise Linux 4 / CentOS 4預設安裝單核心核心,多CPU/多核心機器需手動安裝kernel-smp套件並配置啟動載入器。現代發佈版核心已內建SMP支援,本文供歷史版本維護參考。
cat /proc/cpuinfo 顯示 processor > 0)。init 3)。rpm -ivh kernel-smp-2.6.9-42.EL.i686.rpm
# 或 yum install kernel-smp
mkinitrd -f /boot/initrd-2.6.9-42.ELsmp.img 2.6.9-42.ELsmp
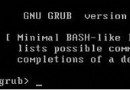
/boot/grub/grub.conf):
title Red Hat Enterprise Linux ES (2.6.9-42.ELsmp)
    root (hd0,0)
    kernel /boot/vmlinuz-2.6.9-42.ELsmp ro root=/dev/sda2
    initrd /boot/initrd-2.6.9-42.ELsmp.img
default=0。uname -r # 應含 smp 字樣
cat /proc/cpuinfo # 顯示多個 processor 項目
top # 按 1 顯示每個 CPU 使用率
uname -r 不再出現 smp 後綴,但 CONFIG_SMP=y 已編譯進核心。systemctl enable --now irqbalance 自動分發中斷至多核心。cpupower frequency-set -g performance(高效能負載)或 ondemand(預設)。numactl --interleave=all 運行記憶體密集型應用。SMP支援已成Linux核心標準配置,歷史手動安裝流程見證了多核心時代的到來。