VLC 媒體播放器內建桌面通知功能,可在 Unity/桌面環境顯示目前播放曲目、影片資訊。預設關閉,需於偏好設定啟用 LibNotify Notification Plugin。本文以 Ubuntu 13.10 為例,詳細說明啟用步驟與通知持續時間調整。
前置條件
- 已安裝 VLC:
sudo apt-get install vlc
- 桌面環境支援 FreeDesktop 通知規範 (Unity、GNOME、KDE 皆支援)
啟用步驟
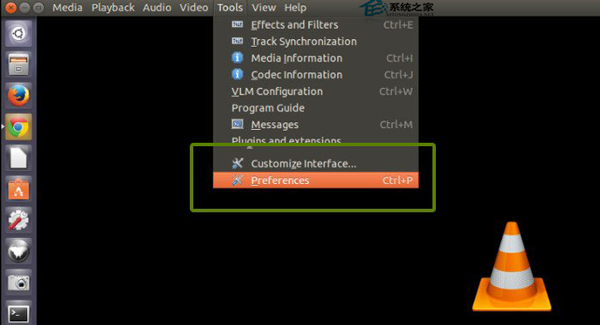
- 開啟 VLC,選單列 Tools (工具) → Preferences (偏好設定)
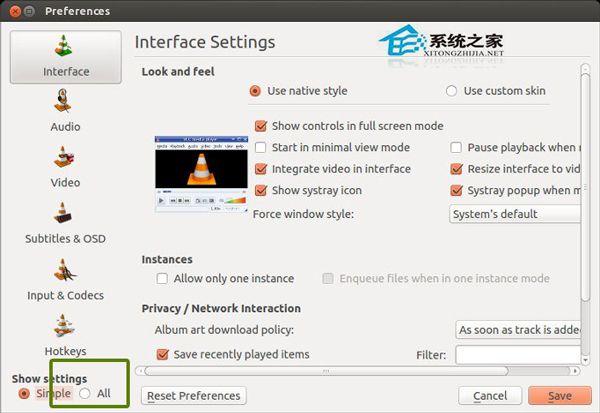
- 左下角選擇 All (全部) 顯示進階設定
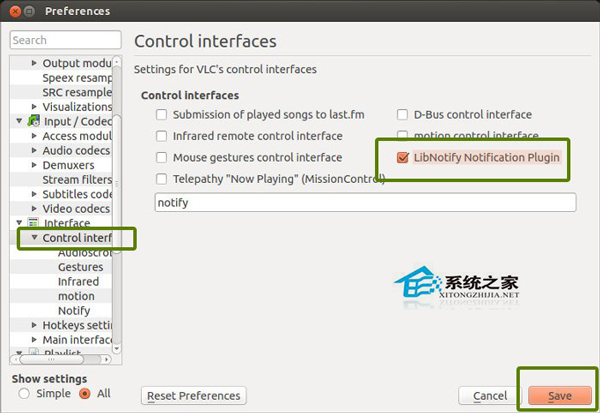
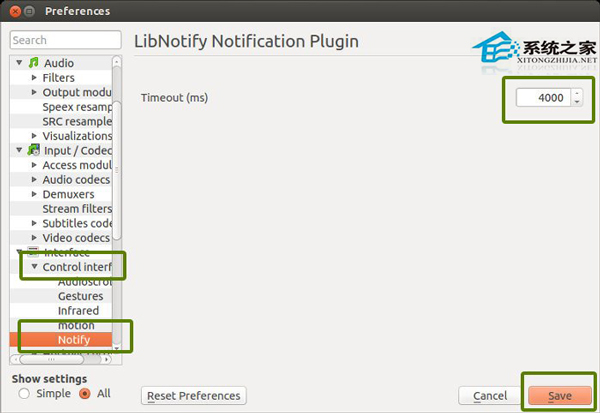
- 左側樹狀目錄展開 Interface (介面) → Control interfaces (控制介面)
- 勾選 LibNotify Notification Plugin
- 點擊 Save (儲存)
調整通知顯示時間
- 同樣在 Control interfaces 下找到 Notify (通知) 子項
- 修改 Timeout (超時時間),預設 4000 毫秒 (4 秒)
- 可依喜好調整 (如 3000=3秒, 5000=5秒)
效果展示
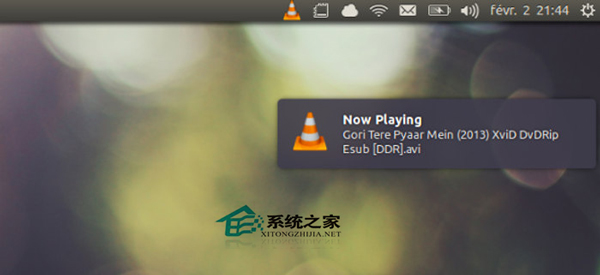
播放音樂/影片時,桌面右上角將出現整合 Unity 風格的通知氣泡,顯示標題、藝術家、專輯封面等資訊。
常見問題排查
- 通知不顯示:確認
libnotify-bin 已安裝,重啟 VLC
- 通知樣式異常:桌面環境需支援 FreeDesktop 標準,Unity/GNOME/KDE/Xfce 均相容
- 重啟後失效:檢查 VLC 設定檔
~/.config/vlc/vlcrc 中 control=libnotify 是否保留
總結
三步驟啟用:Tools → Preferences → All → Control interfaces → LibNotify Notification Plugin。搭配 Timeout 調整,即可享受無縫桌面播放提醒體驗。