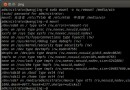
配置 FTP、Telnet 等基於 xinetd 超級守護進程的服務時,執行 service xinetd start 報錯 xinetd: unrecognized service,原因是系統未安裝 xinetd 包。本文提供各發布版安裝命令、服務管理與常見服務配置模板。

xinetd (Extended Internet Services Daemon) 是超級守護進程,按需啟動網絡服務(如 FTP、Telnet、RSync、TFTP)。**現代 Linux 發布版預設不安裝 xinetd**,需手動安裝。
| 發布版 | 安裝命令 | 服務名 |
|---|---|---|
| RHEL/CentOS/Fedora/Rocky/AlmaLinux | yum install xinetd -y / dnf install xinetd -y | xinetd |
| Debian/Ubuntu | apt update && apt install xinetd -y | xinetd |
| openSUSE/SLES | zypper install xinetd | xinetd |
| Arch/Manjaro | pacman -S xinetd | xinetd |
# 啟動並設開機自啟
systemctl enable --now xinetd

# 狀態檢查
systemctl status xinetd

# 重啟/停止
systemctl restart xinetd
systemctl stop xinetd

# 查看監聽埠口
ss -tlnp | grep xinetd/etc/xinetd.d/# /etc/xinetd.d/vsftpd
service ftp
{
disable = no
socket_type = stream
wait = no
user = root
server = /usr/sbin/vsftpd
log_on_success += HOST PID
log_on_failure += HOST
nice = 10
}# /etc/xinetd.d/telnet
service telnet
{
disable = yes
socket_type = stream
wait = no
user = root
server = /usr/sbin/in.telnetd
log_on_failure += USERID
}# /etc/xinetd.d/rsync
service rsync
{
disable = no
socket_type = stream
wait = no
user = root
server = /usr/bin/rsync
server_args = --daemon
log_on_failure += USERID
}# /etc/xinetd.d/tftp
service tftp
{
socket_type = dgram
protocol = udp
wait = yes
user = root
server = /usr/sbin/in.tftpd
server_args = -s /var/lib/tftpboot
disable = no
per_source = 11
cps = 100 2
flags = IPv4
}# 1. 編輯 /etc/xinetd.d/服務名
vim /etc/xinetd.d/vsftpd
# 2. 重新加載 xinetd(不中斷現有連接)
systemctl reload xinetd
# 或
killall -USR2 xinetd
# 3. 驗證埠口監聽
ss -tlnp | grep :21 # FTP
ss -ulnp | grep :69 # TFTP| 維度 | systemd 直接管理 | xinetd 托管 |
|---|---|---|
| 啟動方式 | 常駐進程 | 按需啟動 |
| 資源佔用 | 持續佔用內存/埠口 | 無連接時零佔用 |
| 適用服務 | 高頻、長連接 (SSH, HTTP, DB) | 低頻、短連接 (FTP, TFTP, RSync) |
| 配置複雜度 | 低 (unit 文件) | 中 (xinetd.d + 服務配置) |
| 現代趨勢 | 主流 | 漸少(systemd socket activation 替代) |
systemd 原生支援 Socket Activation,可完全替代 xinetd:
# /etc/systemd/system/ftp.socket
[Unit]
Description=FTP Socket
[Socket]
ListenStream=21
Accept=yes
[Install]
WantedBy=sockets.target

# /etc/systemd/system/ftp@.service
[Unit]
Description=FTP Service
[Service]
ExecStart=/usr/sbin/vsftpd
StandardInput=socket

# 啟用
systemctl enable --now ftp.socketyum/apt/dnf install xinetd 一鍵解決「unrecognized service」。但**新架構優先選 systemd socket activation**,僅維護舊服務(TFTP、舊設備 RSync)時使用 xinetd。配置修改後用 systemctl reload xinetd 熱加載,避免中斷現有傳輸。