SSH 密鑰認證比密碼認證更安全、更便捷,是服務器運維、自動化部署、CI/CD 流水線的標準配置。本文從密鑰生成、公鑰分發、服務端配置、客戶端驗證、禁用密碼登錄、多密鑰管理,提供全流程圖文指導。
# 推薦 Ed25519(現代、快速、密鑰短)或 RSA 4096(兼容性最好)
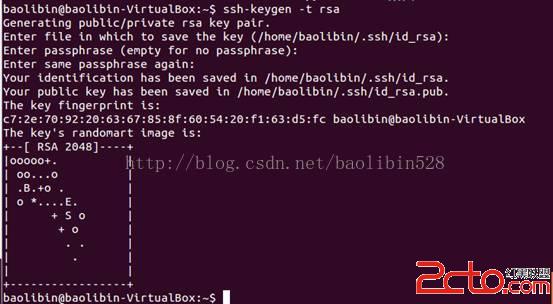
ssh-keygen -t ed25519 -C "user@host-$(date +%F)"
# 或
ssh-keygen -t rsa -b 4096 -C "user@host-$(date +%F)"

# 交互提示:
# Enter file in which to save the key (/home/user/.ssh/id_ed25519): 回車用默認
# Enter passphrase: 可選,設置則雙因子(私鑰+密語),自動化留空
# 生成:~/.ssh/id_ed25519 (私鑰) 和 ~/.ssh/id_ed25519.pub (公鑰)
mkdir -p ~/.ssh
chmod 700 ~/.ssh
touch ~/.ssh/authorized_keys
chmod 600 ~/.ssh/authorized_keys

# 方法一:ssh-copy-id(自動處理目錄權限、去重)
ssh-copy-id -i ~/.ssh/id_ed25519.pub user@server_ip

# 方法二:手動複製(無 ssh-copy-id 環境)
cat ~/.ssh/id_ed25519.pub | ssh user@server_ip "mkdir -p ~/.ssh && chmod 700 ~/.ssh && cat >> ~/.ssh/authorized_keys && chmod 600 ~/.ssh/authorized_keys"

# 方法三:本地編輯後 scp 上傳
scp ~/.ssh/id_ed25519.pub user@server_ip:/tmp/
ssh user@server_ip "cat /tmp/id_ed25519.pub >> ~/.ssh/authorized_keys && chmod 600 ~/.ssh/authorized_keys"
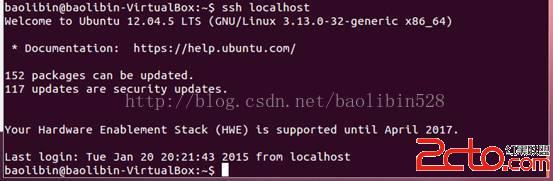
ssh user@server_ip
# 應直接進入 Shell,無需輸入密碼(若設置了密語則輸入密語)
sudo vim /etc/ssh/sshd_config

# 關鍵設置
PubkeyAuthentication yes          # 啟用公鑰認證
PasswordAuthentication no         # 禁用密碼認證(驗證免密成功後執行)
PermitRootLogin prohibit-password # root 僅允許密鑰登錄
PermitEmptyPasswords no           # 禁用空密碼
ChallengeResponseAuthentication no # 禁用鍵盤交互認證
UsePAM yes                        # 保留 PAM(如雙因子)

# 可選:限制認證嘗試、閒置超時
MaxAuthTries 3
ClientAliveInterval 300
ClientAliveCountMax 2
sudo systemctl restart sshdputtygen.exe → Generate → 滑動鼠標生成隨機數 → Save private key (.ppk)。ssh-ed25519 開頭),粘貼到服務端 authorized_keys 新行。.ppk 文件。# ~/.ssh/config
Host github.com
HostName github.com
User git
IdentityFile ~/.ssh/id_ed25519_github
IdentitiesOnly yes
Host server-prod
HostName 192.168.1.100
User deploy
IdentityFile ~/.ssh/id_rsa_prod
Port 2222
IdentitiesOnly yes
Host *
IdentityFile ~/.ssh/id_ed25519
IdentitiesOnly yes使用:ssh server-prod 自動匹配對應私鑰、端口、用戶。
| 現象 | 原因 | 解決 |
|---|---|---|
| 仍提示輸入密碼 | 公鑰未正確寫入 / 權限過寬 / 服務端禁用 PubkeyAuthentication | 檢查 authorized_keys 內容、權限 600、~/.ssh 700、sshd_config PubkeyAuthentication yes |
| Permissions too open | 私鑰/authorized_keys/.ssh 目錄權限過大 | chmod 700 ~/.ssh && chmod 600 ~/.ssh/authorized_keys ~/.ssh/id_* |
| Agent admitted failure to sign | ssh-agent 未運行或未添加私鑰 | eval $(ssh-agent) && ssh-add ~/.ssh/id_ed25519 |
| 連接超時 | 防火牆/安全組未放行 22/自定義端口 | 放行端口、檢查 sshd Port 配置 |