Ubuntu 安裝 NVIDIA 專有驅動後,常面臨「系統顯示設定無高解析度選項」、「重啟後解析度重置」等問題。本文記錄從 nvidia-settings 圖形配置到手動編輯 /etc/X11/xorg.conf 永久固定解析度 (以 1440x900 為例) 的完整解決路徑。
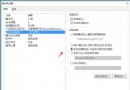
nvidia-glx/nvidia-driver 但無法生效。nvidia-settings 臨時調整為 1440x900 後,重啟 X 又恢復 1280x1024。# 終端執行 (需圖形環境)
sudo nvidia-settings/etc/X11/xorg.conf,但權限/格式問題常導致寫入失敗或重啟失效。sudo cp /etc/X11/xorg.conf /etc/X11/xorg.conf.backupsudo gedit /etc/X11/xorg.conf核心原理:X Server 依序嘗試 Modes 列表中的解析度,採用「螢幕支援的第一個」。若首項為不支援的解析度 (如 1440x1440),會 fallback 到次項 (1280x1024)。
修改策略:將目標解析度 1440x900 移至每個 Depth 子區塊 Modes 列表首位。
Section "Screen"
    Identifier     "Default Screen"
    Device         "nVidia Corporation GeForce 7300 SE"
    Monitor        "LAW982"
    DefaultDepth   24
    Option         "AddARGBVisuals" "True"
    Option         "AddARGBGLXVisuals" "True"
    Option         "NoLogo" "True"
    SubSection "Display"
        Depth     1
        Modes    "1440x900" "1280x1024" "1280x960" "1152x864" "1024x768" "832x624" "800x600" "720x400" "640x480"
    EndSubSection
    SubSection "Display"
        Depth     4
        Modes    "1440x900" "1280x1024" "1280x960" "1152x864" "1024x768" "832x624" "800x600" "720x400" "640x480"
    EndSubSection
    SubSection "Display"
        Depth     8
        Modes    "1440x900" "1280x1024" "1280x960" "1152x864" "1024x768" "832x624" "800x600" "720x400" "640x480"
    EndSubSection
    SubSection "Display"
        Depth     15
        Modes    "1440x900" "1280x1024" "1280x960" "1152x864" "1024x768" "832x624" "800x600" "720x400" "640x480"
    EndSubSection
    SubSection "Display"
        Depth     16
        Modes    "1440x900" "1280x1024" "1280x960" "1152x864" "1024x768" "832x624" "800x600" "720x400" "640x480"
    EndSubSection
    SubSection "Display"
        Depth     24
        Modes    "1440x900" "1280x1024" "1280x960" "1152x864" "1024x768" "832x624" "800x600" "720x400" "640x480"
    EndSubSection
EndSection# 方案 A: 重啟顯示管理器 (GDM/LightDM)
sudo service gdm restart
# 或
sudo systemctl restart lightdm
# 方案 B: 重啟系統
sudo reboot登入畫面即為 1440x900,桌面進入後系統顯示設定亦顯示當前解析度 1440x900。
在 Section "Device" 加入:
Option "NoLogo" "True"完整片段:
Section "Device"
    Identifier     "nVidia Corporation GeForce 7300 SE"
    Driver         "nvidia"
    Option         "NoLogo" "True"
EndSection/etc/X11/xorg.conf.d/ 建立片段檔 (如 10-monitor.conf) 而非完整 xorg.conf。xrandr --output HDMI-0 --mode 1440x900 --rate 60 可熱插拔切換,無需重啟 X。xorg.conf Modes 僅作備選參考。| 現象 | 檢查項目 |
|---|---|
| 修改後進入黑屏/低解析度 | 1. cat /var/log/Xorg.0.log | grep -i mode 查看實際採用模式2. 確認 Monitor 區塊 HorizSync/VertRefresh 範圍涵蓋目標解析度 3. 恢復備份 cp xorg.conf.backup xorg.conf |
| nvidia-settings 無法儲存 | 以 root 執行 sudo nvidia-settings,或手動編輯 xorg.conf |
| 雙螢幕解析度錯亂 | 在 Device 區塊加入 Option "DynamicTwinView" "False" 禁用動態雙顯示 |
| 驅動版本與核心不匹配 (DKMS 失敗) | 重新安裝 linux-headers-$(uname -r) 並 dkms autoinstall |
NVIDIA 驅動下解析度問題本質是 X Server 模式選擇邏輯與螢幕 EDID 偵測不匹配。手動編輯 xorg.conf 將目標解析度置於所有 Modes 列表首位,從根源上強制 X Server 採用期望模式。現代系統雖推薦無配置檔自動偵測,但理解 Modes 優先序機制對排查疑難雜症仍具核心價值。